Elderflower rush

Its very nearly the end of the the elderflowers for this year, in fact in some parts of the country I’m sure they are already gone gone gone. But in a few places there are still some good ones to be found so if you are quick you might be able to grab a few flower heads and make cordial, champagne or…guess what……yes flavoured vodka.

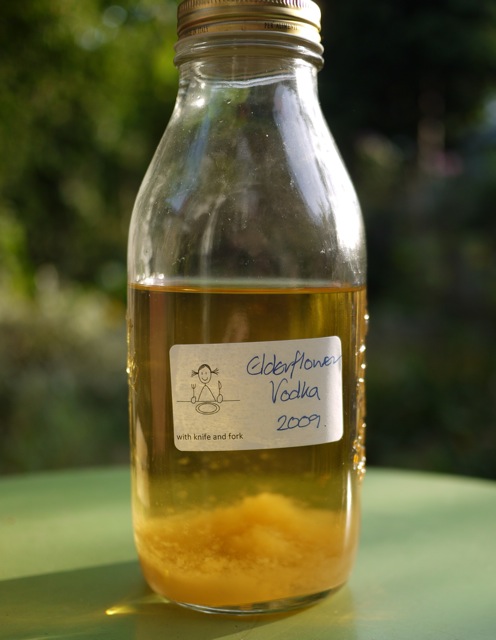
Somehow I seem to have gathered a reputation for all things flavoured voddy and a few people have asked for the method for doing an elderflower one. So here it is:

6-8 good size elderflower heads in full bloom
750ml – 1l of vodka – basic supermarket is fine
250g-300g granulated sugar
a large glass jar or a s/steel pan will do

Make sure there are no bugs on the elderflowers.
Put the sugar then the flower heads in the jar or pan.
Pour over the vodka. I don’t use citric acid like you are supposed to in the cordial because I don’t think you need it here.
Stir.
Cover.
Leave to steep for at least a week preferably three. It will go a very pale sand colour. Or possibly look like ditchwater. This is okay
Stir or shake if the jar has a good seal regularly to help the sugar dissolve.
Strain either just with a sieve (so expect a bit of debris) or through muslin/coffee filter for a clearer result.
Bottle.
Leave to mature for at least 4 weeks or longer, the longer you leave it the mellower it gets but as elderflower is delicate you don’t want to leave it for ages, sloes and damsons can mature for a couple of years and get better but this would lose its flavour.
Drink straight. Use as a mixer like you would cassis. Or give it as gifts if you make loads.

Here’s a blog post with my more general method and tips for flavoured voddies:

http://withknifeandfork.com/a-peek-in-the-pantry

Fresh from the oven: Turkish Pide

I’ve been a bit remiss on contributing to the Fresh from the Oven challenges of late, I missed out on doing croissants and pizza, both things I really fancied trying. Well i did do the pizza but I forgot to blog in in time, oops!

So this month I got well ahead of myself and made the challenge almost week for the deadline instead of on the day!

The bread we baked was Turkish Pide and the challenge was hosted by Mrs Ergul.

I had a bit of fun with the US measurements getting muddled and almost using a whole stick of butter instead of half. But I got there in the end. The bread was really easy to make and very tasty. Mrs Ergul says the dough might be very wet but mine actually started off quite dry so I had to add more water to get it fairly sticky. I used my usual kneading technique of short gentle kneads spaced out through the rising.

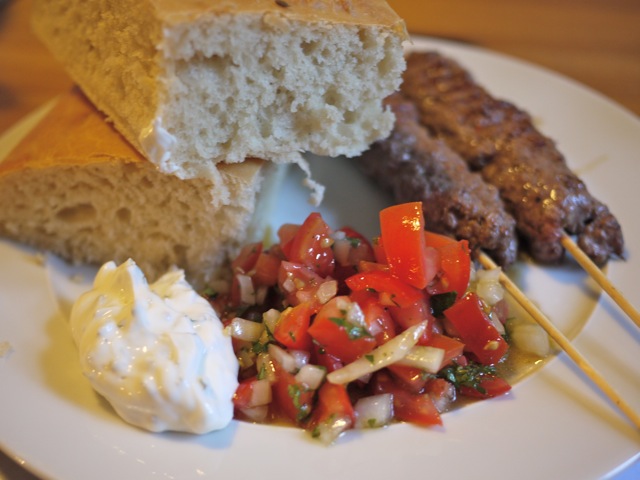
To go with the bread I made some Turkish inspired kebabs (minced beef, chilli, cumin and coriander), some minty yoghurt and some tomato and onion salad. It was very yummy and I think they bread’s soft texture would be great with burgers. We used up the rest of the bread with dips the next day.

Here’s the method as given to us my Mrs Ergul (with some UK annotations by me):

Ingredients:

4 cups (to 5 cups) All Purpose Flour (ie plain flour, I only needed 4 cups and I used a cup measure as I have a set. 1 cup is approx 130g of flour)
1 and 3/4 cups Warm Water (1 cup = 236ml)
1/2 stick Butter ( melted ) (1 stick = 113g)
1/2 tablespoon Instant Yeast
1 tablespoon Sugar
1/2 tablespoon Salt

Topping:

Black and White Sesame Seeds (I used cumin seeds as I didn’t have sesame seeds)

In a large mixing bowl, mix all of the dry ingredients
Add melted Butter and Warm Water into this mixture and knead
The dough should be sticky
Cover the bowl with a plastic wrap and keep it in a warm place for rising
Let the dough rise to double its size
Knead the dough again until it is bubble free
Place a parchment paper on a 13″ by 10.5″ baking tray
Take the dough to the tray and make it flat with your hands until it cover all of the surface of the tray
Dampen your hands with Water if the dough stick to your hands on this step
Then take a knife and give the dough square shapes going deep down
Sprinkle some Sesame Seeds on top
Preheat the oven to 350F (R4/180C)
Let rise the dough for half an hour
Bake it for 30 minutes or until the color of pide turns light brown
Take the pide out of the oven and let it cool for 20 minutes and cover it with a clean kitchen towel to keep it soft

Mutton dressed as lamb, why not go the whole hogget

It’s late spring (well it was when I wrote and it was published, we’ve now just edged into summer) and a time many of us associate with lamb, in fact, it’s common to think of lamb as a traditional dish for Easter. A moment to pause and think about this should make us wonder why? Easter can be as early as 22 March and as late as 25 April; and we mostly all know that spring is when lambs are born so how are these lambs old enough to be ready to eat by Easter? Well they aren’t. The lamb that is marketed early was born in autumn and there are some breeds where this is the norm (primarily Dorset breeds such as Down, Horn or Poll). But not that many so unless you are sure of your source you might be paying a premium price for lamb that has been ‘encouraged’ to lamb in the autumn and then had an indoor life fed on concentrated feeds such as soya pellets. Not perhaps as natural as you might hope. Like almost anything in food it pays to know the provenance of what you are buying including when things are truly in season and what might have been involved to bring them to you essentially ‘out of season’. So the majority of British lamb is not yet ready for the table but will start to be when we get near the end of June and into July, at its best by September when it will really pays to explore different breeds that have been grazing outdoors on their local flora for a good 5-6 months; then you’ll be able to taste the effects of grazing on salt marshes or moorland, highland or lowland.

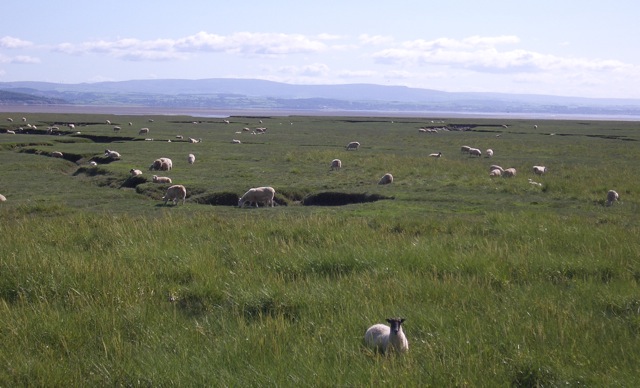
Salt marsh sheep

But what to do until then, after all it feels like it should be time to have some lamby dishes whether British inspired or from further a field. Well you can seek out some lamb from breeds that do naturally lamb in the autumn, as the meat will be top notch right now. You could simply wait and bide your time. You could buy New Zealand lamb; no don’t do that! Although excellent from good producers on its home soil it’s almost impossible to know in the UK whether you are buying good, indifferent or poor quality. Or you could try British reared hogget or mutton instead. Technically a hogget is a sheep between 1 and 3 and mutton is 3+ years old.

Ah mutton yes. I know I’ve immediately conjured pictures of old good-for-nothing stringy over cooked meat, Mrs Beeton and over boiled vegetables! Of course this is not the case mutton is as delicious as lamb, just different. As Hugh Fearley-Whittingstall points out (in his seminal The River Cottage Meat Book, highly recommended for all matters meaty) “mutton is to lamb, as beef is to veal”, both have a place but one is fuller in flavour the other more delicate. It seems that somewhere along the way we have lost this notion of mutton as delicious and now we even use lamb to make hot-pots, or ragouts. There has been a shifting in attitude since 2004 when Hugh first wrote his book with the likes of Farmer Sharp championing mutton with chefs and the public alike. But essentially mutton is still seen as the speciality and lamb the ‘regular’ option. This makes no real sense, many recipes that call for lamb use robust flavours that will simply drown the delicate flavour of even the best quality lamb, and the lack of sufficient fat means that lamb actually won’t respond well to some of the cooking methods. Best then to save the lamb for a special treat, cooked simply at its prime from July to September and instead invest in some mutton for your summer inspired dishes.

Good mutton doesn’t have to be cooked until its gray either (or indeed ever) a joint of hogget or ‘young’ mutton (3-4 years old) will work well roasted or barbecued but still left pink, it has a good balance of sweet fat to meat meaning it will be more succulent than pretty much any lamb would be right now. So for the next month (and most of the rest of the year) while we wait for lamb to really be in its prime why not try a cut of mutton?

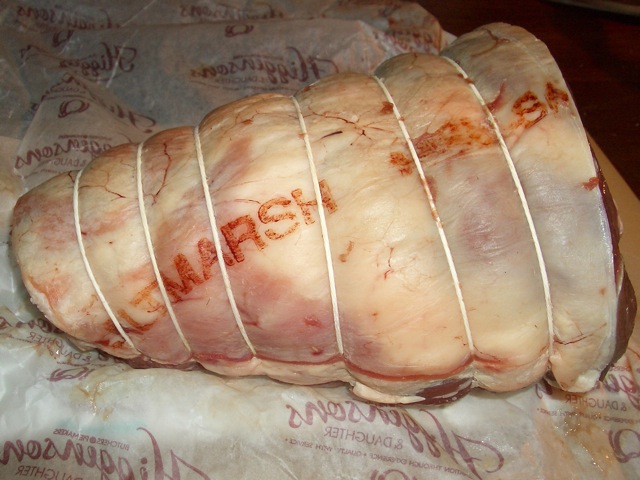
Waiting to be butterflied

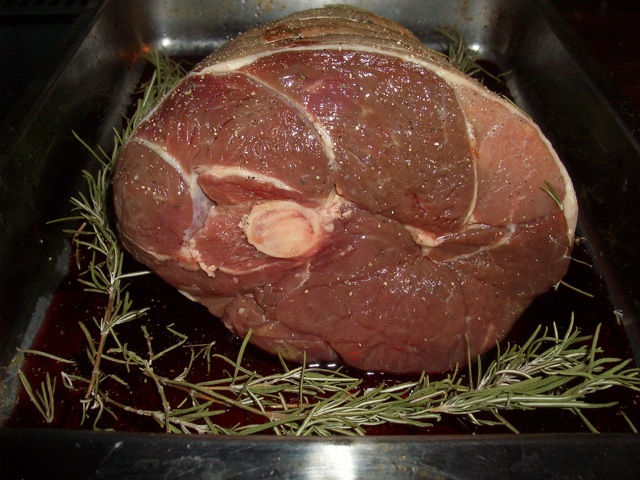
Boned, butterflied leg or shoulder of mutton

½ – 1 leg or shoulder of mutton

½ bottle of red wine (right now its English wine week so you might want to track down an English red)

4 large sprigs of fresh rosemary

6 black peppercorns

1 – 2 tbsp oil (I use extra virgin rapeseed)

peel of an orange or lemon (only the outer surface not the pith, easiest done with a sharp potato peeler)

  1. If your butcher hasn’t already then bone the leg or shoulder and open it out to create one large flat piece of meat. Place the meat skin side down and slash the meat side in a criss-cross pattern to a depth of about 1cm at about 4cm intervals.
  2. Pout the wine in a dish big enough to fit the meat in flat, add the peppercorns, rosemary sprigs and orange peel. Lay the meet in the dish meaty side down and leave to marinate for at least a couple of hours.
  3. When ready to cook heat a barbecue or cast iron grill pan until hot. Remove the meat from the marinade and pat off any excess. Leave the peppercorns, rosemary and peel in the wine for now.
  4. Place the meat on the barbecue or griddle skin side down to start and turn regularly to cook from both sides until it’s done to your liking. This can take anything from about 25-45 minutes depending on the thickness of the meat and how pink you want it to be.
  5. While it’s cooking reduce the wine on a fast boil (remove the other ingredients) to concentrate the flavours add a tablespoon or two of oil near the end and stir vigorously to help the mix emulsify and create a glossy slightly thicker sauce.
  6. Slice the meat into pieces about ½ cm wide and serve with the sauce, a green salad or steamed vegetables and a big bowl of buttered new potatoes.

You can find out more about mutton and places to buy at www.muttonrenaissance.co.uk

This article was first published in Francoise Murat & Associates newsletter.

Asparagus Rolls

I love asparagus. Really love it. I could eat it everyday for the duration of its short season and not get bored. In fact I would probably have it nearly the same way each time, nice and simple with good butter or oil. I might steam it, roast it or chargrill but I’d still dress it simply. I might have it with some cured ham or hard tangy cheese. But in the main I’d let the asparagus do all the talking.

And once the season was over that would be it. No more asparagus for a whole year. Because even more so than other vegetables asparagus loses much of its taste if its transported any distance. Not for me asparagus flown in from Thailand or Peru or Chile, it just doesn’t taste good enough to justify its price or its carbon footprint. The perfect situation for me would be to grow some in the garden but we don’t really have the space to create raised beds and London clay doesn’t make asparagus happy. I might dare to try it in a large tub and see how I get on; even a few home grown spears would be a wonderful thing to have. Until then though I’ll buy at local farm shops and PYO to get the best flavour. And I’ll eat and eat it until the season is done.
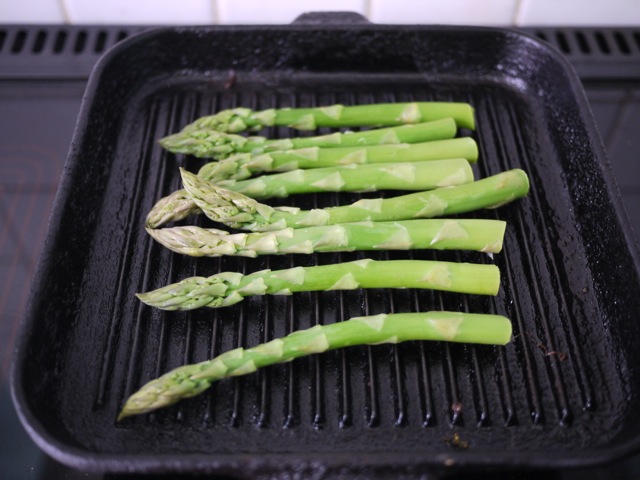
The short season usually starts in late April (traditionally St George’s Day) and lasts through to mid June though of course this is dependent on the weather during winter and early spring. Anywhere with sandy soil is good for asparagus growing and each well-known area from Formby in the North West to East Anglia and the Vale of Evesham stake their claims for being the best. Of course the best asparagus is what you can find that has been picked very recently and arrived in your kitchen quickly and landed on your plate ready to eat with minimal fuss.

Asparagus has always been prized and ‘The Neat House Gardens’ relates how the early market gardens surrounding London vied to produce asparagus as early as Candlemas by use of hot-bedding techniques and the liberal application of horse manure sent out from the city with the forced vegetables being sent back for consumption by the rich. Up to at least Mrs Beeton’s time asparagus continued to be forced and available from January. But at some point forced asparagus seems to have disappeared so either it didn’t taste much good or the cost became prohibitive, by the time Jane Grigson is writing about it in the 1970s there is no mention of it.

Times have changed in terms of cooking as well. Modern books suggest it takes about 8-12 minutes to steam whereas in the 1800s Acton, Beeton et al were saying 20-25 minutes of boiling and Grigson says it can take anywhere between 20-40 minutes. Goodness knows how big the spears needing 40 minutes were! Maybe the varieties grown have changed and we certainly seem to prefer our vegetable with lots more crunch than in the past but still 40 minutes seems extreme unless the aim was to make puree. Also common was to serve asparagus on toast to soak up some of the water from the boiling, steaming of course gets rid of this problem. And naturally the Victorians’ had special asparagus tongs for serving, mind you I think they had special cutlery for serving just about everything you can think of.

Recipe wise asparagus is often paired with eggs: hollandaise, dipped in boiled eggs, in omelettes, with fried egg in tapas, in tarts and quiches. Salty cheeses and cured meats also make great partners. Then there is the classic soup (which I have to confess I’ve never tried). Oh and of course with salmon or crab or chicken or….well almost endless possibilities. Googling ‘asparagus recipes’ gives 3.3 million hits so there is no shortage of ideas out there. One site I do recommend though is Fiona Beckett’s http://www.matchingfoodandwine.com/ which will help you pick the right wine to enjoy with your treasured asparagus; focus on how you are serving it to help you make a good choice.

Because you can easily find so many ways to serve asparagus I thought I’d offer you something a little different. Flipping through various books I found a recipe from Hannah Glasse in 1747. Here it is (complete with archaic spelling and quirks):

Asparagus forced in French Role

Take three French Roles, take out all the Crumb, by first cutting a Piece of the Top-crust off; but be careful that the Crust fits again the same Place. Fry the Roles brown in fresh Butter, then take a Pint of Cream, the Yolk of six Eggs beat fine, a little Salt and Nutmeg, stir them well together over a slow Fire, till it begins to be thick. Have ready a hundred of small Grass boiled, then save Tops enough to stick the Roles with; the rest cut small and put into the Cream, fill the loaves with them. Before you fry the Roles, make Holes thick in the Top-crust to stick the Grass in; then lay on the Piece of Crust, and stick the Grass in, that it may look as if it was growing. It makes a pretty Side-dish at a second Course.
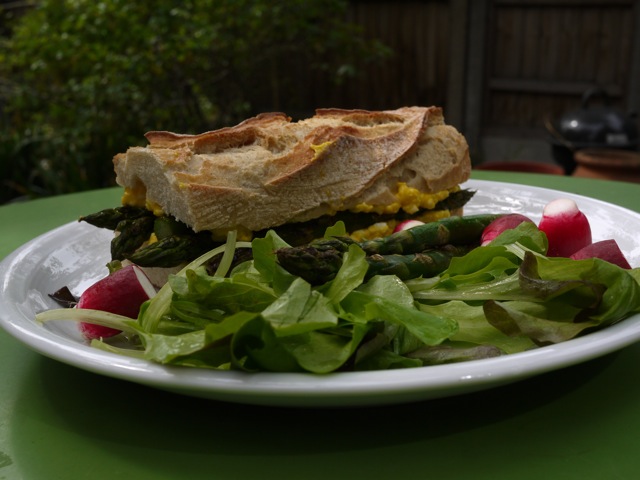
Inspired by this I did:

Asapargus and Egg Rolls:

Serves 1 for lunch

1 crusty French roll or half a small baguette

8 spears of asparagus

1 large or two small eggs

Mayonnaise (fresh or your favourite shop bought)

Cut the top off the roll, remove some of the crumb or else you will face the dangers of squirting egg mayonnaise everywhere. Hard boil the egg(s) and make into a light egg mayonnaise with as little mayonnaise as will just bind the eggs. Part steam or blanch the asparagus and then finish on a chargrill. Slather the egg mayonnaise on both sides of the bread. Put the asparagus on the bottom part of the roll. Put the top of the roll back on. Serve with salad. Watch out for escaping egg mayonnaise.

This article was first published in Francoise Murat & Associates newsletter in May 2010.
Easy Lunch: Asparagus

I’ve said on here before how much I love asparagus and I’m very certain I will be saying it again before the season is over. Earlier in the week I went really simple with steamed asparagus and slithers of Ticklemore cheese popped under the grill until the cheese was just melting. The salty goats cheese was great with the asparagus. I didn’t take pictures though because I was so busy eating it.

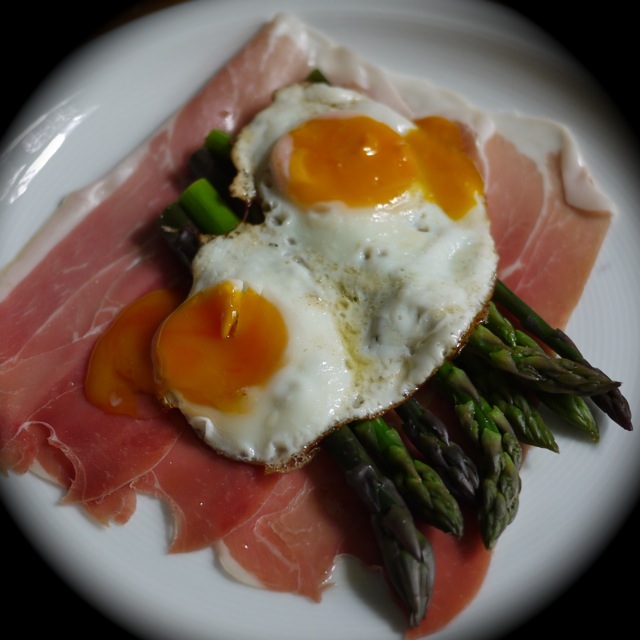
Today I went for Parma ham, steamed asparagus and fried guinea fowl eggs.

Oh yum.

I don’t think you need instructions to be able to copy this, of course feel free to substitute the egg of your choice.

This week I am mostly eating asparagus from Norfolk.

Fresh from the Oven: Savoury Kringel

Its been a while since I’ve taken part in any of the Fresh from the Oven challenges; either I had the time but the recipe didn’t appeal (usually because it was sweet, I don’t really do sweet baking) or the recipe looked great and I was mad busy. When I first looked at this challenge from Jo’s Kitchen my heart sank to my boots, yet another sweet recipe I thought and rolled my eyes. Then I spotted tucked at the bottom that instead of sugary raisiny chocolately sweetness there was an option with cheese. Yes CHEESE one of my ALL TIME favourite foodstuffs.

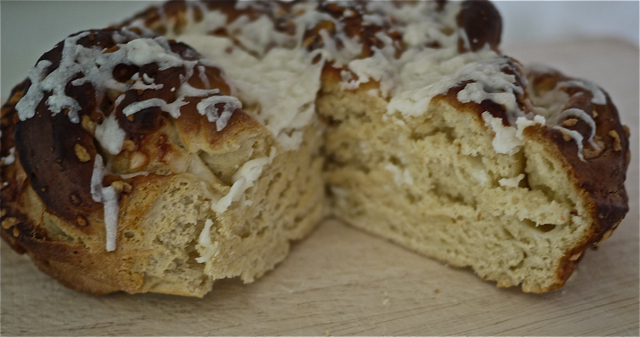
The finished article

I still left making it to the last day though, now there’s a surprise! So this morning I was dashing about making sure I had the right ingredients. Naturally my instinct to not follow ANY recipe to the letter immediately sprang into action and instead of getting some cheddar at the shops (which they had) I was drawn in by some hard goats cheese from Lancashire and bought that instead. This may have something to do with the fact that cheddar, even really good cheddar, is not really that high up my list of favourites but Lancashire most definitely is.

So off I set to make the recipe. The original recipe does not give full instructions for the savoury version so this is my adaptation (note I did half of these quantities). You can see the original recipe here.

Savoury Kringel

Ingredients (Makes 1 large loaf)

  • Dough
  • 40g fresh yeast (I used 1 sachet fast action yeast for ½ the flour)
  • 1tbsp sugar
  • 250ml milk, lukewarm (I had to add about another 10ml to my 125ml as the dough was too dry)
  • 2 egg yolks
  • 50g butter, melted
  • 600-700g flour (I used 300g of strong white bread flour)
  • I didn’t add any salt as I know my cheese was very salty.
  • Filling and topping: 4oz grated hard strong cheese such as cheddar

Method

Mix the yeast and sugar in a bowl. Add the lukewarm milk and egg yolks, then mix in the flour and melted butter and knead well. Shape the dough into a ball, cover the bowl with a tea towel and leave to rise in a warm place for 30 minutes. (I did three fast Dan Lepard style kneads over a 1 hour rise)

Preheat oven to 200°C/Gas 6. Dust your work surface with flour (I used oil I never use flour). Take the dough out of the bowl, knock it back and roll out to a thickness of 1cm (mine was prob less than 1cm). Sprinkle about 2/3 of the grated cheese over the rolled out dough.

Roll up the dough like a swiss roll and cut it in half with a sharp knife (lengthways). Starting from the uncut end, plait the dough, lifting each half over the other in turn. Finally, shape the plaited bread into a B shape (mine was circular as I only had half the quantity) and transfer to a greased baking tray. Bake for about 25 minutes or until golden.

Once cooked turn off the oven, sprinkle the bread with the rest of the cheese and put it back in the cooling oven for 5-10 mins until the cheese melts. Allow to cool fully and serve.


Ready to eat

Was it good, yes. Will I make it again, I might. I think it would be good with soup (we had a chunk with salad). It looks rather attractive and it is easy to make so it would be a good loaf to make if you have guests. I’m not 100% sure I like savoury filling that much with an egg enriched dough as I find the taste and texture a little too cakey with the savouriness, but that’s just me.

A Lancashire Macaroni Cheese

I don’t particulary recall eating macaroni cheese as a child not from a Heinz tin, not lovingly made by mother or grandmother, its simply not a dish that springs to mind as something we ate often. I don’t know why. So when Fiona Beckett started the idea of the ultimate mac n’ cheese (as our friends in the US of A call it) I thought this would be an ideal opportunity to create my own version. Fiona’s competition started out simple and then got lots of categories (best this, best that, best other and so on) and I toyed with the artisanal cheese category for quite sometime knowing which cheese I would choose. And then Fiona announced the prizes and my mind was made up I had to have the Emma Bridgewater macaroni cheese dish come what may. So my entry is for the most original recipe.

Starting with my artisanal cheese idea and then spooling it out into the dish my mother or grandmother could have made I decide this had to be a dish based in the foods of Lancashire (well apart from the macaroni of course). I played with adding things like vimto or tizer, might they be secret umami giving ingredients, unlikely, so they were consigned to the ‘too original’ slot. Some researching in Laura Mason and Catherine Brown’s Traditional Foods of Britain (if you don’t have this book and you love British food just get it) led me to two possibilities: potted shrimps or bury black pudding. A tough one a really tough one. So I flipped a coin and it came down on the side of the black pudding.

Here’s what I did (its in old measures in honour of my Grandma):

A Lancashire Macaroni Cheese

Ingredients (for 2 hungry people):

1 bury black pudding (the sort in a hoop shape and of about 1” diameter)
3-4 oz dried macaroni each – depending on your greed
¾ pint full fat milk
1 oz flour
1 oz butter and some for frying
4 oz Sandhams Tasty Lancashire cheese*
2 oz Booths** Special Reserve Tasty Lancashire Cheese*, grated/crumbled
salt
pepper

pre heat oven to R4/180C

Method:

  1. Cook the macaroni in boiling lightly salted water as per the instructions on your packet (mine said 8 minutes). When cooked drain and keep on one side.
  2. Slices the black pudding into ½” rounds and fry quickly on either side in a small amount of butter. You are aiming for the outside to be crispy and the middle still soft. Removes the skin from the pudding and crumble the slices.
  3. Make a white sauce of a thickish consistency (between coating and panada) using the ‘all in one’ method. So put the flour, milk and butter in a pan and heat gently stirring continouosly until it thickens. Add the 4oz of Sandhams Tasty Lancashire cheese and season to taste.
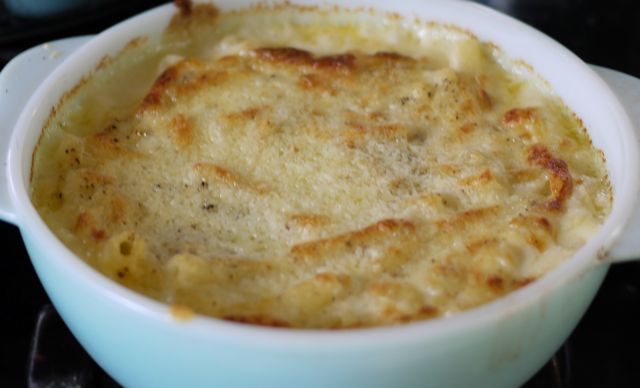
  4. Find a shallow dish, butter it (dream of it being this Emma Bridgewater dish).
  5. Toss the crumbled black pudding in with the cooked macaroni, stir in the cheese sauce. Tip it all in the buttered dish.
  6. Sprinkle with the 2oz of Booths Special Reserve Tasty Lancashire.
  7. Bake in the oven for 30 minutes.
  8. Eat and dream of Lancashire.

* If you don’t know that there’s more than 1 version of real Lancashire cheese then watch out for my tasting of seven types coming soon. I’ve picked these two examples because like all Lancashire they melt beautifully and because they differ in strength, the Sandhams is slighty milder (but still with a good tang) the Booths** has a strong tasty Lancs hit.

** Booths is a small supermarket chain based in the North West of England. If all supermarkets were like Booths it would be a good thing.