Panang Gai (dry chicken curry)

At the end of March I went off to the depths of Suffolk to meet Veronica from Leaf House. She’d asked me to come and visit to talk about how I might be able to help her as she switched the focus of her business. She also promised to make me a curry for lunch. We had a great day chatting business stuff and I can report that the curry was A-Mazing.

So I made sure I got the recipe. I’ve made it twice so far and it really is simple and gorgeous. Don’t be put off by the long list of ingredients for the paste its worth it.

Panang Gai, dry chicken curry

This is the recipe as Veronica gave it to me, with my adaptations in brackets:

First you have to make the red curry paste but you can blitz this to make it easier (I did and it was super easy). And you will have heaps left over to either make this one again or just use it for a ‘normal’ red curry 9I did half the amount so had none leftover). If you blitz rather than pound the paste, its a good idea to do at least day before so flavours ‘meld’ together (I didn’t I wasn’t that organised).

Red Curry Paste

nb.. recipe is from an Australian book ‘Thai Cuisine’ by Mogens Bay Esbensen… 1 cup = 250mls and 1 tablespoon is 20ml

1 cup shallots (red onions) chopped
1 cup garlic, chopped
1 cup lemon grass, tender parts only, chopped (I didn’t have any)
2 tablespoons coriander root (I didn’t have any of this either)
2 tablespoons galangal/laos root… fresh or dried, chopped
2 teaspoons peppercorns
2 teaspoons coriander seeds, roasted
2 teaspoons cumin seeds, roasted
2 teaspoons lime or makrut zest, grated
1 teaspoon nutmeg, ground (I didn’t add this as am not much of a nutmeg fan)
1 teaspoon mace (I didn’t have any)
20 – 30 dried red chillies (I used chilli flakes about 2 teaspoons worth)
4 tablespoons shrimp paste (kapee) (didn’t have any of this either)
2 tablespoons salt

Grind all together really well. Store in large, well sealed jar in the fridge. Keeps well. (As you can see I didn’t have lots of the ingredients BUT it still made a lovely curry)

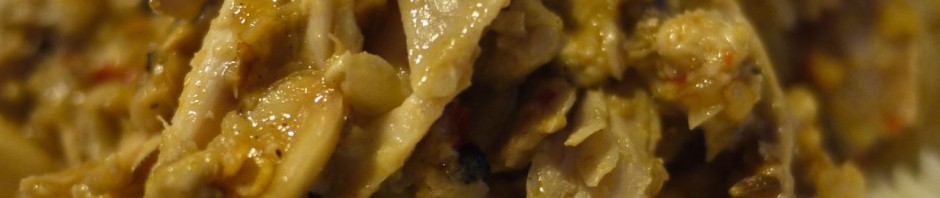
Panang Gai.. dry chicken curry

750g chicken breast (I used left over roast chicken as that what I had and it was a mix of breast and leg meat)
1 tablespoon fresh or tinned green peppercorns, crushed (didn’t have any)
50g plain flour (ooops forgot this)
100ml vegetable oil
50g red curry paste
250ml coconut cream (not milk)
25g sugar
40ml fish sauce
60g roasted peanuts, chopped
Basil leaves to garnish.

Remove skin from chicken and cut into bite sized pieces. Rub crushed green peppercorns into the chicken meat and then toss in flour (obviously I didn’t do this bit). Heat oil in wok and stir fry chicken pieces until well coloured and nearly cooked. Remove chicken to platter and set aside.

Add curry paste to wok and stir fry for 2 minutes. Stir in coconut cream, sugar, fish sauce and peanuts. Stir well for 5 minutes.
Toss in chicken and coat with the thick sauce. Turn out onto serving platter and garnish with basil leaves.

note: I cooked the curry paste and sauce first and cooked for longer to thicken it as I hadn’t used flour, probably for 10 minutes. Then I added the chicken and cooked for another 10 minutes. I added some bamboo shoots at the end because I had some.

I think the secret is in making the spice paste it seems to give a much better tasting result.

Making paneer

I LOVE cooking curry, its so much better when you make it yourself. And it also means you can use an ingredient I don’t think you see enough of in menus and that’s paneer.

Better still paneer is really easy to make yourself so you can feel super smug home-made curry AND home-made paneer.

Panner and whey

So last time I fancied curry I decided I’d do some paneer. I got a bargain carton of proper whole milk in the supermarket reductions and I was away.

Paneer (makes enough for 1 main dish curry for 2-4 depending on what else you serve)

2 pints whole milk
2 tbsp lemon juice

1. Heat the milk in a pan until it comes to a boil. stir it to prevent it burning.
2. Turn the heat right down and add the lemon juice stirring as you add it. Turn off the heat.
3. Continue to stir off the heat whilst the curds form.
4. When the curds have separated leave to stand for 10 minutes.
5. Carefully spoon the curds into a muslin lined colander or sieve. Fold the muslin over the top and weigh down with a plate a tin.
6. Leave to drain and firm overnight.
7. Unwrap and store in the fridge covered until needed. It will keep for two weeks.
If the curds don’t separate properly initially then add a little more lemon juice and reheat.

I used the whey in bread making, it gives a lovely loaf for toasting.

Spicy sour green pickles

So the tomatoes should have been ripe ages ago but mine still look like this:

Which means I’ll be making batches of green pickles again this year. But that’s okay because I rather like the green pickles. I made them first with under ripe plums that I collected in deepest Suffolk with Vivia of Grethic’s Grethica. She also tracked down some recipes which she posted links to here. Its worth watching the you tube clips because they are a bit bonkers but to make it a bit easier I’ve given the recipe the way I did it here.

You need:

Lots of unripe tomatoes or plums

Sour pickle:

1 quantity (see note) each of fenugreek seeds, mustard seeds, red chilli flakes, cumin seeds, coriander seeds

½ quantity of salt

¼ quantity of tumeric

rapeseed oil

Sweet and sour pickle:

8% salt

4% tumeric

50% sugar

rapeseed oil

In both cases the quantities take a bit of guess work. In the second one I assumed it meant use 8% of the weight of fruit you have etc. In the first one it was harder so I just did what looked like a sensible quantity for the fruit I had the get a good level of spiciness.

This is what you do:

Cut the tomatoes (or plums) into quarters. Discard the stones if you have plums. I usually make one batch of each type so I split the total fruit in half then carry on.

Sour pickle:

Mix the spice and salt together in a bowl. Add the fruit and coat with the mix. Cover with cling film and leave somewhere light and warm for 3-4 days. Pack tightly in sterilised jars and cover with rapeseed oil. Leave it to mature for at least a month. This one is quite like lime pickle so is great with curries. I use any leftover spicy oil for cooking curry as well.

Sweet and sour pickle:

Mix the salt and tumeric together and add the fruit. Coat. Cover with clingfilm and leave in a bright warm place for 2-3 days. Add the sugar and leave for a further 3-5 days. Pack into sterilised jars and cover with oil. As this one is sweeter it also works well with cheeses or cold meats.

Here is what you end up with:

Spicy chickpea pancakes


When it came to deciding what to have for dinner on Saturday there was quite a bit of negotiating to be done – I fancied doing a curry but hubby gets to have what he tells me is a really good take out curry once a week for his lunch so was much less keen. As we wandered up and down the aisles in the local Waitrose pondering our choices I knew that time spent in a shop would take its toll and that if I kept my nerve he’d go with the curry idea in the end…..and so it came to pass that curry was on the menu.

I particularly wanted to do a curry as I’d spied bags of chickpea (gram) flour earlier in the week and under a somewhat misguided thought that one of the Indian breads was traditionally made with gram flour I wanted to give it a go. Quite where my notion that gram flour is used in Indian breads had come from I don’t know because of course once I got home with my 2 kilo bag and started looking out recipes I realised I was very wrong. I paused for thought, disappointed. Where was my mate Jay just when I needed some guidance on authentic uses for gram flour – not anywhere to be found. But in the back of my mind there was a niggling little thought that I had seen something made with gram flour that wasn’t a deep fried bhaji or pakora. Further searching and at last I found the recipe I was looking for ‘Onion pancakes’ in a book called Brit Spice by Manju Malhi. It a quick and easy recipe and you can adjust the flavourings to suit.

Makes about 6-10 pancakes depending on how thick you like them (so serves 2-4):

I onion, peeled and chopped
1 chilli, peeled and chopped (I didn’t have a fresh chilli so used about ¼ tsp dried chilli flakes)
1 tomato, peeled and chopped (I hate peeling tomatoes its such a faff so I left the skin on)
1tsp peeled grated root ginger (lazy ginger worked fine)
250ml/9fl oz water
150g/6oz chickpea/gram flour
1tsp cumin seeds
¼ tsp salt
oil to fry

Put the onion, chilli, tomato, ginger and water in a blender and blast until you have a runny paste – doesn’t need to be ultra smooth just get it mixed together pretty well.
Put the flour, cumin and salt into a bowl and mix together so the cumin seeds are well distributed.
Add the paste from the blender and mix to get a runny batter.
When you are ready to cook the pancakes heat a frying pan (15cm/6inch size), add a little oil, ladle in some batter to cover the pan base fairly thinly and cook for about 30 seconds or so each size. Put on a warm plate and get using the rest of the batter till you have a nice stack of pancakes.
Serve with the curry of your choice or with chutney and raita. Any that are left are also good cold with dips and tangy cheese. Yum.


I’ll definitely be trying these again (not least because there’s a lot of flour left!) and might see how they come out unspiced.

Just for the record

Those who have been following carefully might wonder where the very last of the roast chicken went.

You’ll be please to know that the cat didn’t get it but instead it ended up as a quick lunch in a fresh white lovely soft floury roll with lemon mayonnaise (or salad cream for one of us) and tomato. It was breast meat – perfect.

So in these credit crunch times lets see whether overall we got value from the chicken. We had 4 meals (for 2 people each time) using the meat (roast, curry, pie, sandwich) and about 5 pints of stock, which will make 10 potions of soup or risotto or whatever. The chicken cost £11.32 – you can do the maths anyway you want but that means it cost £1.42 per portion if you ignore the stock and 63p if you don’t.


Not bad going whatever angle you peer at it from.

Roast chicken leftovers (Tuesday night is curry night)

So what have we done so far with our roast chicken leftovers (apart from store them safely in the fridge of course)?

Well one of the favourite options is to rustle up a quick curry – always good whether you go for a creamy or a tomato based option. Probably not very authentic but WAY BETTER than anything you’ll get in a supermarket heat and eat; and believe me I know, I’ve tried a lot of heat and eat curry in my time searching for one that’s vaguely good. They are few and far between. Even if the supermarket recipe started out more authentic it’ll never taste quite as fresh and zingy as something you do yourself. So next time you’ve some leftover chicken gives this recipe a whirl and your taste buds a treat.


We went for a tomato based option and did a side of chickpeas and purple sprouting broccoli (because we happened to have a few bits of the latter lurking in the fridge drawer).


First the chicken curry…..

(enough for two – scale up with the chicken meat for greater numbers and add some water if there’s 4 of you, more tomatoes if there’s six – we could have made enough for six with the meat we had left but decided to save it for later in the week). 

The pan: we always use some kind of low sided sauté type pan for curry as this helps the sauce thicken faster than a regular sauce pan would – which is quite important.


The onion: we pretty much always start by frying up an onion fairly finely chopped so its starts to colour but not get too dark (it can get bitter if it over colours though I have found a great curry recipe with really crispy onion but I’ll save that for another post).

The spices: then we add the spices which are a mix of mostly freshly ground and a few ready prepared; we just go with the flow of what we fancy taste wise and how hot we want it to be (this last point always being up for a bit of debate as I’m a bit of a curry wimp when it comes to the chilli content). This time we used coriander and cumin seeds, ground turmeric, dried chili flakes and a chopped fresh red chilli. We toss the spices with the onions for about a minute to start to release the flavours – boy does it start to smell lovely.

Tomatoes: we add a tin of chopped tomatoes and raise the heat so it all starts to simmer down.

The chicken: as the tomatoes begin to bubble quite vigorously we add the chicken meat, which I’ve pulled off from one of the legs and cut into smallish chunks.
We leave this to bubble away fairly rapidly, keeping an eye out and stirring every so often to prevent it catching on the pan bottom. 

While that’s working its curry magic we get the chick peas and sprouting broccoli on the go, cutting the latter up into small florets and tossing with the chick peas, a tiny bit of water and a few twists from a garam masala spice mill plus a good dollop of greek yoghurt to coat everything. This cooks away and thickens whilst we pop on the basmati rice and get some bowls warming.

The chicken curry needs a good 20- 30 minutes of swift bubbling to get the chicken heated through and the sauce nice and concentrated, the chick peas and broccoli need about 15 minutes cooking (thought they’ll survive more if the timings go a bit awry) and the basmati needs 10 minutes boiling and few minutes after its drained to help fluff up.


Then its into the waiting bowls, to the table and dive in for a tasty curry experience. Pretty good all round authentic or not. 

Oh and there still at least two meals left on the chicken before we even get to thinking about maybe making stock.