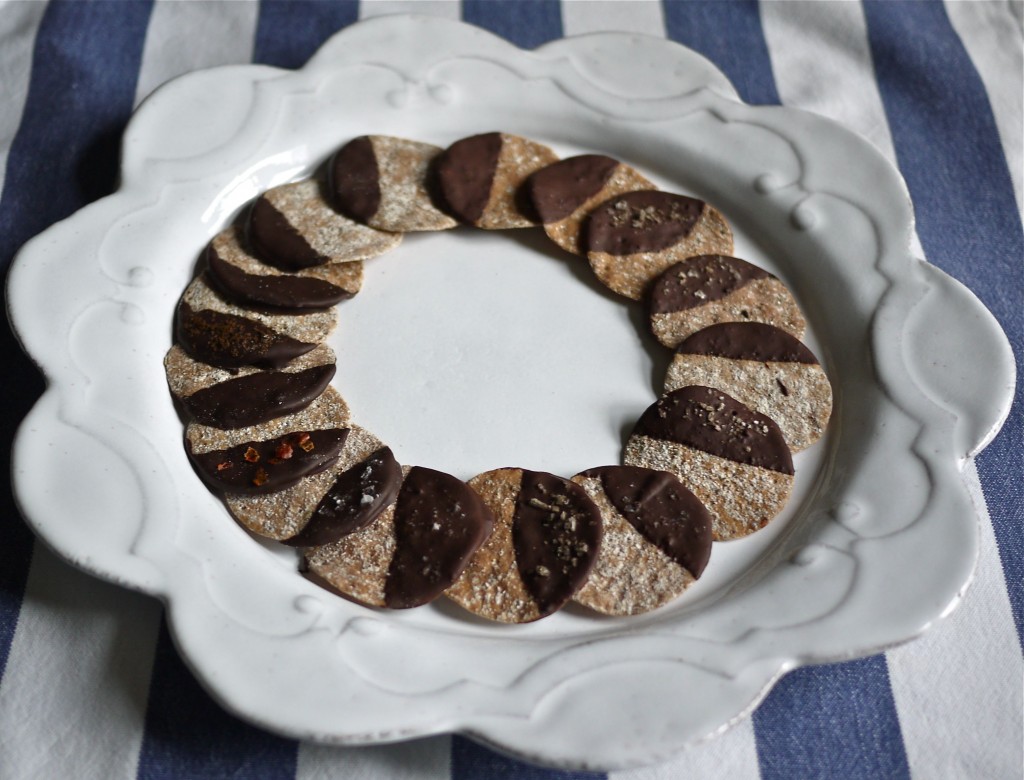
Chocolate dipped crispbread

One of the great things about working, in my day job, with people who make lovely food is that I get to taste it and also get to be a part of thinking about new products and new recipes.

What could be better?

So when the team at Peters Yard were getting together for our 2013 planning day I thought I’d try an idea I’d been toying with for some time.

Chocolate dipped crispbread. Yes really.

Now Peters Yard are no ordinary crispbread. They are made to an artisan Swedish recipe with sourdough starter and simple ingredients. The taste amazing. Watching people be wowed when they first taste them is great. They are the non plus ultra of crispbread, indeed of crackers in general.

So I decided to keep it all very simple and not compromise on ingredients. I melted some top quality chocolate (I used Willie’s Cacao Chefs Drops) in a bowl over a pan of barely simmering water. Once molten and glossy I dipped mini crispbread in the chocolate and laid them out on baking parchment to set. I also drizzled some with the last of the chocolate to make squiggly patterns.

The team loved them with coffee. The fruitiness of the chocolate complimented the slight sourdough tang of the crispbread. The smooth texture contrasted well with the crispiness. All in all a success. The team suggested that additions of a little sea salt or finely ground coffee beans sprinkled over when the chocolate was setting would also be good. So I’ve done a second batch and I’m about to try them now.

I think they would make great end to a meal as ‘petit fours’ or as a gift to someone. They will last about two weeks or so in carefully sealed box or tin. Because they took about 10 minutes to make and only about an hour completely to set I also think they make a wow plate of indulgence at anytime.

For really good instructions on melting chocolate take a look at this article in the Guardian. I would say that because the crispbreads have a little coating of flour you are never going to get a super glossy result so go with the bowl over water or microwave option. If using a microwave be very careful and do short bursts and keep checking, if you overheat then the chocolate will go granular, it will taste fine but be harder to work with.

Disclosure: Peters Yard is a client of my business Bright Blue Skies. The crispbread had been provided for free. The chocolate drops I bought in Waitrose.
 

Meet Herman, the cake

A few weeks ago there was a knock at the door on Saturday afternoon….who could it be? Too late for the postman, no guests expected….I sent lovely husband to find out, just in case it was a salesperson ;o

It was the next door neighbour with a plastic tub and a piece of paper and muttering something about Herman…..husband, I believe, looked bemused so she said ‘give it to Linda she will know what Herman is’ and thrust the box and paper into his hands.

And so it came to pass that we were the recipients of a Herman the German Friendship Cake sourdough starter. The chain letter of baking.

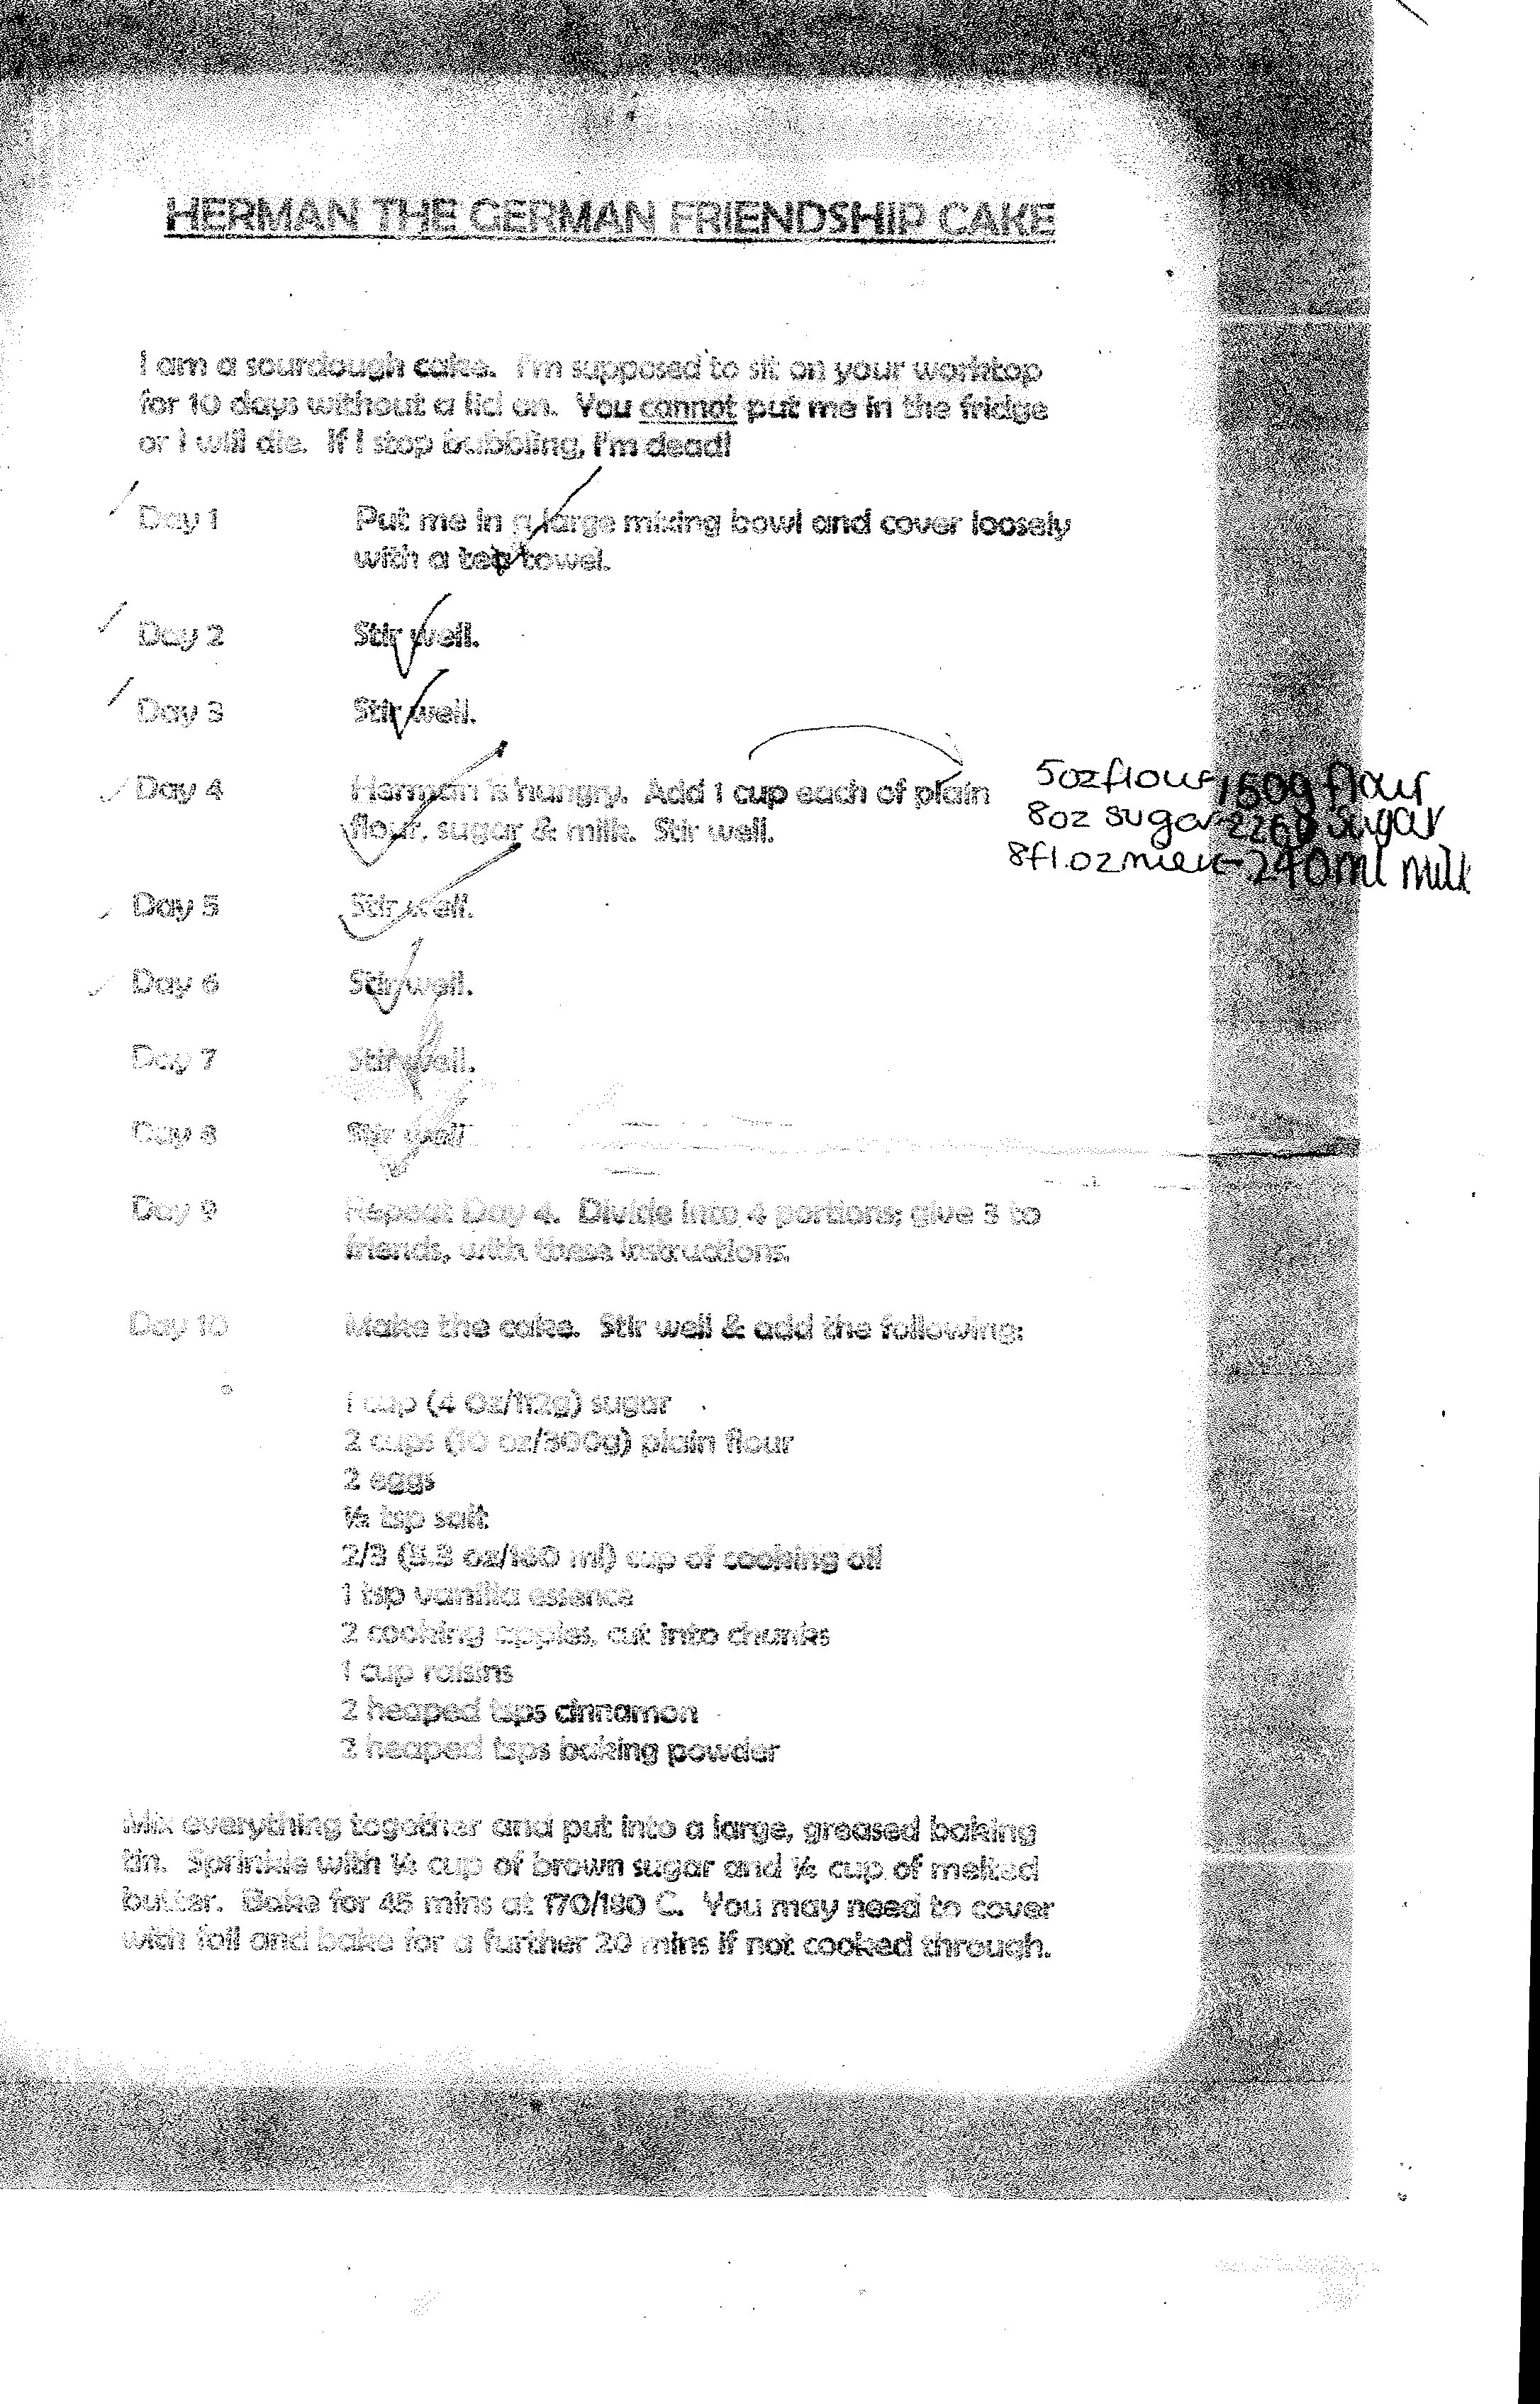
Herman’s care program

I had seen mention of Herman by a few other bloggers over the last year and not being a cake baker or eater was rather hoping he wouldn’t land in my kitchen. But land he had.

In common with most chain letters the friendship element is somewhat undermined by the way in which you feel compelled to do as the letter asks or feel guilty for breaking the chain. A sort of low grade emotional blackmail that I hope doesn’t exist in real friendships! In the case of Herman the the emotional pull comes from the fact that you might apparently kill him if you don’t look after him:

‘You cannot put me in the fridge or I will die. If I stop bubbling, I’m dead’

Oh good, not so much as a gift more a kind of burden. Apparently you also have to do everything on the exact right day or it won’t work.

That said it does feel quite nice to be given something by the neighbours in a world were we mostly only say hello in passing.

Probably if you have read much of my blog or if you happen to know me then you’ll know I’m not one to follow a recipe without making tweaks. And so it was with Herman.

I decided it would be sort of fun to see if he worked and also fun to see if he would still work if I broke some of the rules. After all I know from my bread baking that you don’t kill sourdough by putting it in the fridge you just slow it down and you don’t kill it if you don’t quite feed it to program and if it looks like its breathing its last you can usually revive it.

So I sort of followed the instructions but as day 10 (the day to bake the cake) was going to fall on a work day when I was with a client I mashed it up a bit and just extending the process so that I could make the cake at the weekend. I also knew that on day 9 I was unlikely to see anyone to share the starter with (plus I wasn’t sure I wanted to oblige a further 3 people to make a cake) so the surfeit of Herman starter is in the fridge and he looks a little listless but he sure isn’t dead.

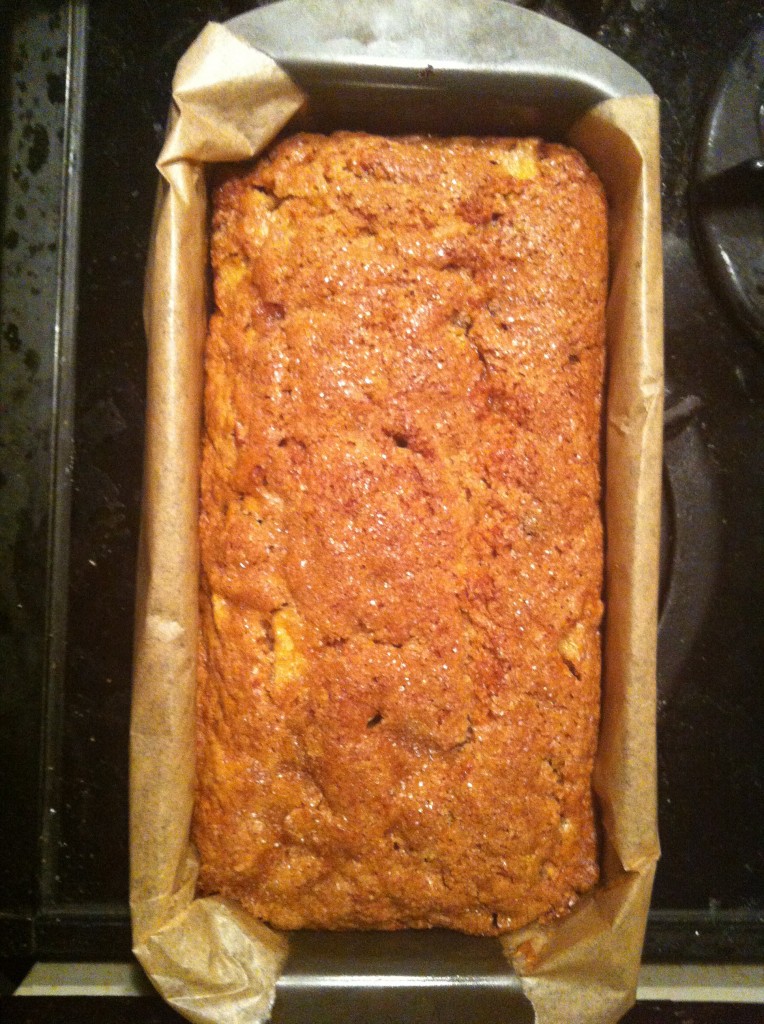
Finished cake

The cake mix seemed a little dry so I added some extra milk when mixing it, possibly a mistake as the resulting cake although cooked through was so moist and soft it fell apart when you tried to slice it. I baked for the longer time as most people seemed to think this gave a better result. Taste wise it was really good a little on the sweet side for me (look at all that sugar in the instructions). As ever we only got about half way through before we forgot about it only to find it a week later alive and kicking with mould.

Verdict:

– if you like cake and you want to experiment with sourdough this is an easy way to start

– if you like the idea of sharing cake mix with neighbours then you’ll love this

– don’t believe the emotional blackmail of Herman dying –  he won’t and you don’t have to pass him on, breaking the chain is never a diaster

You can find more about Herman here should you want to start your own, or receive one and need to find out more.

Feeding time at the sourdough zoo

A little while back I set a sourdough starter running. The first ten days to two weeks you are just supposed to leave the mix of flour water and grapes to get on with doing its own thing although the urge to peek, tweet and blog about progress got the better of me. In the process I experienced the joys of seeing the starter come to life and also its unique and pungent smell!


After 10 days it was time then time to start the daily feeding routine. This involves feeding the starter twice daily with flour and water. It becomes a regular routine but it too has its interesting nuances and moments of both joy and concern.
So what happens? Well first of all you get rid of the grapes.
Remove them from the starter:


Squeeze any remaining juices from them back into the starter. And discard, their work is done: 


Tip away about 1/3 of the mixture (roughly 4-500ml):


Then top up with 250150ml of water and 150100g of flour. Mix it in and pop the lid back on.  

Everyday, twice a day, you discard 200ml of the mix and add 150ml of water and 100g of flour. You do this for TWO WHOLE WEEKS. It gets a bit monotonous. Then you start to worry, when after a few days, nothing seems to be happening, there might be a few bubbles but not much, the smell is much less (which is nice, but also makes you wonder if all is on track). Each time you lift the lid the flour will have settled out and so you need to stir the mix to get a lovely wallpaper paste type consistency before you discard 200ml. Oh and if you are thinking this discarding is wasteful, well maybe, but do the maths and you’ll see that you’ll have gallons of the stuff if you just keep adding water and flour and not getting rid of any – which is fine if you are planning on starting a bakery but not if you’re simply hoping to make some tasty bread for home consumption.

After about a week of not much happening, and egged on by Dan at FoodUrchin (he’s about two months ahead of me in the sourdough game), I dared to taste the starter. WOW. Its sort of like sherbet fizz stuff – this is the progress we need. We are on track.

In the second week of feeding the starter got lots more active with a good thick yeasty top each time it was feeding time. This might have been temperature fluctuations as well as the starter getting going because week one of feeding was pretty cool and week two we had what, by UK standards for May, was almost a heat wave. At each feeding your stir the yeasty topping back in before discarding some.

At last, at the end of two weeks feeding, preceded by two weeks of waiting/peeking, there was a starter that looked good and active.

It was time to move to baking bread…….but that’s another story.


Easy peasy BBQ baby chicken

Ahhhhhh its barbecue time of year and barbecue kind of weather: smell the grilling food, hear the chink of glasses, the laughter, the fun, the delicate aroma of firelighters, the burnt food, the lobster tinged neighbours. England, the summer.

But it’s be a shame not to join in with at least some of this, right? Correct.

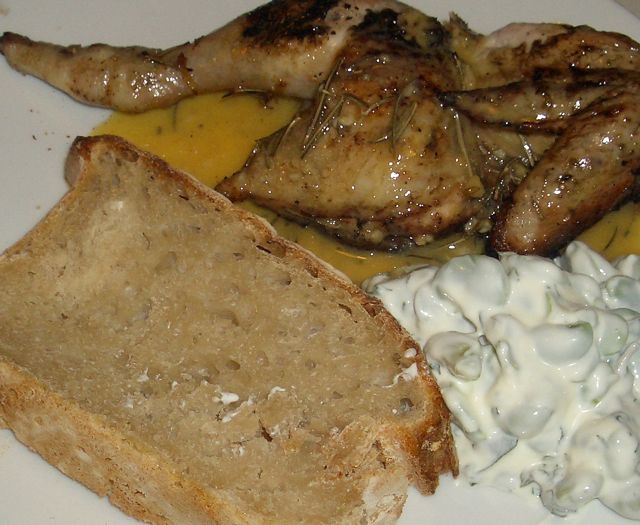
BBQ PoussinHere’s the easy chicken (well poussin actually) we did last night:
2 poussin butterflied (dead simple this, lie it breast bone down, hold the parsons nose, cut along either side of the backbone and remove, flip it over, press down firmly on the breast to flatten, et voila. If stuck try YouTube for clips).

Marinade in lemon juice, zest, oil, garlic and rosemary for a couple of hours (use 50:50 juice to oil).

Light barbecue (using your preferred method: paper, firelighters, gas ignition) and wait for coals to be that delightful glowing cooking temperature.

Pop the poussin over the heat and cook for about 30 minutes turning regularly (cook it with skin side up more often than down, this way it cooks the meat from the inside without over cooking/burning the skin).

Meantime heat the remaining marinade in a saucepan and simmer hard to reduce to a nice glossy sauce.

Cut each poussin in half to make 4 portions. Eat with veg and carbs of your choice.

Lemony poussin, sourdough, broad beans, yoghurtWe had homemade sourdough bread to mop up the sauce/juices and broad beans tossed in minty yoghurt.

Yum.


Under the bonnet: Sourdough progress

On Sunday Monday I finally decided to make a sourdough starter. It takes FOUR weeks of patient waiting and ‘feeding’ before you get to make a loaf.


Blimey.

I’m not a patient person so each time I pass I have to try very hard to resist taking a peek to see what’s happening under the lid. Sometimes I just manage to leave it alone others I succumb. So I thought I’d share these peeks with you so you too can live the joys and worries of making sourdough.

I’ll keep updating this post so come back if you want to see what’s a foot – or follow me on Twitter to hear the latest. As I add new pictures they’ll be right here so you’ll need to scroll down if you want to watch the full process.

Update 6 (above): Well the yeasty foam is disappearing day by day to reveal the pinky brown cloudy liquid – nice. The smell is just as bad each time I lift the lid – so I’m mostly staying away. Feeding commences Friday 8.00am BST so have stocked up on flour and am ready to enter phase 2 with my sourdough – can hardly wait. Date/time: 13 May 2009 2.00pm BST

Update 5 (above): its now been just over a week since I made the sourdough thing (yes its a thing). I tried not to peek too much this weekend as we had guests and I imagined they might not want to feel like they were visiting an unattended football teams sock laundry pile! Anyway today the starter is looking rather sad. Its getting a bit of the promised pink tinge but the thick yeasty foam is collapsing and glimpses of dirty looking liquid can be seen below. Ugh. Only a few more days before the phase 2 feeding ritual commences….Date/time: 11 May 23.00 BST

Update 4 (above): just clocked through 100 hours of bubbling (and waiting). Its getting smellier but so far this isn’t creeping out to fill the kitchen (a good fitting lid is clearly essential). Here’s more of a close up on all that home grown yeasty-ness. Date/time: 9 May 2009 9.30am BST

Update 3: We are now 3 1/2 days in and its smelling like a VERY ripe cheese (but still only if you lift the lid). It doesn’t look much different from yesterday so I decide to prod it with a spoon. I can tell its liquidy underneath with a thick sticky stretchy topping. Still yellow-ish coloured. This is where may patience is going to be tested severely I think…..Date/time: 8 May 2009 8.00am BST

Update 2: At 60 hours its going a bit crazy, lots of bubbling, bit more smelly and I’m worried its going to break free from the bowl: Date and time 7 May 2009 9.30am BST


First up: 36 hours old, yellowy colour, flour has settled to bottom, slightly tangy smell starting to develop (but only if you lift the lid): Date and time 6 May 2009 9.15am BST

For starters: thats sourdough starters

I love sourdough bread in all its varieties and I’ve always quite fancied making it myself. Looking around some of my favourite food blogs recently I saw that sourdough is of those things people are trying out – maybe its the credit crunch that makes us all want to bake bread, I don’t know, but it certainly seems to be on the rise (!).


A  bit of looking about, a bit of tweeting and it seemed that the king (and queen) of sourdough recipes comes from Sam and Sam Clarks ‘Moro’ cookbook. It doesn’t seem hard (or maybe it is and I’m just about to find that out) but it requires patience – lots of it – four weeks of it. Like WHAT – I’ve got to wait FOUR weeks before I can even get close to baking a loaf….now I’m not especially renowned for my patience so I decided to go off and look for other starter recipes. But I kept drawing a blank – they seemed too short and they had easy blend yeast in them – like right that’s not real sourdough its just a minor tongue tingle effect.

So back to the recipe from ‘Moro’ and a whole lot of patience.


Here’s what you need and do:


1 bunch of red organic grapes (okay so these aren’t organic but I hope it still works)

Strong white organic flour: 500g

Water: 1 litre
Put the grapes in a muslin bag and secure the top of the bag – just so:
Mix the flour and water together to create a sloppy batter that looks like this:

Bash the grapes around a bit with a rolling pin and remember to save the juices to add the mix.

Having added the juice in go the grapes:

Cover and now its just a waiting game – two weeks and counting to next stage……