Beetroot soup

I love beetroots, especially roasted or in soup. In fact roast beetroot soup is just brilliant, super tasty and very easy to make. I just had some for lunch so I thought I’d share my recipe.

What you need (makes enough for 6 as a light lunch):

1kg of uncooked beetroots

2 large floury potatoes

2 medium onions (chopped)

1 litre of stock (I used the simmering liquid from a gammon a cooked the day before)

rapeseed or sunflower oil

What you do:

1. Wear rubber gloves or you’ll end up with beetroot stained hands!

2. Top, tail and peel the beetroots and cut into quarters (make sure they are roughly even sized so cut larger beets into eighths).

3. Put beetroot pieces in a bowl, pour over about two tablespoons of oil and toss the beets to get them evenly coated.

4. Roast the beets for about an hour in the oven at R6/200C, turning once or twice. Its nice id the corners catch a bit but not too much. They are ready when you can slide a knife in easily.

5. Gently cooked the onions in a tablespoon of oil for about 10 minutes so they are golden and soft.

6. Meanwhile boil the peeled potatoes until soft but not falling apart.

7. Add the cooked beets and potatoes to the onions, pour on the stock. Taste for seasoning. My stock was well seasoned so it didn’t need any more at this stage.

8. Bring to the boil and simmer gently for about 10 minutes. Leave to cool slightly.

9. Blend to a relatively smooth soup using your preferred method/gadget. Pour back in the pan and warm through.

To Serve:

Good things to sere with this are:

– crusty bread and butter or tangy goats cheese

– dollop of creme fraiche/greek yoghurt/cream to swirl in


Burgers, three ways

When the Beyond Baked Beans team asked if I’d do a recipe that would appeal to students for their blog I was pleased but stumped. It’s a long time since I was a student and I was lucky (or unlucky) enough to get through Uni without having to cook much more than the odd slice of cheese on toast and the very occasional chilli. This isn’t because I lived at home rather its because I lived in college all three years and the college catering seemed to be modelling itself on a pretty reasonable hotel. And then each time I came up with an idea another faster more organised blogger had pipped me to the post. And so it is that I thought of burgers, something so easy to make I’d almost missed it….here’s the post I did for Beyond Baked Beans so that you too, as well as all those lucky students, can create your own delicious burgers.

Everyone loves burgers (well everyone who loves meat). Homemade ones are brilliant, once you’ve tried them you’ll never want to buy ready made again, because there is no point. They are really simple to make and they taste so much better.

You can mince the meat yourself but I’m guessing if you have a mincer you probably don’t need me to tell you about making your own burgers….

You should allow between 150g-250g of meat per person depending on whether you like small, medium or really quite large burgers. I find that 3 burgers from 500g is about right if you’ve got toppings and side dishes. Its also important that you go for the 20% fat mince, less fat and your burger just won’t be as juicy and tasty, burgers are not the place to be exercising fat content control. Get the best mince you can find it does make a real difference to the taste.

This is a kind of design your own burger recipe…..

Ingredients (for 3 people):

500g of mince (beef, lamb or pork)

1tsp to 1tbsp of herbs or spices to complement your chosen meat (see below for my favourite combinations)

salt and pepper

3 white buns or rolls, again the nicest you can find

cooking oil

condiments: mayo/ketchup/tomato/mushrooms/sliced cheese/bacon/lettuce/onion as suits you and the burger

sides: chips, coleslaw, salad etc

Method:

Break the mince up in a bowl, add salt and pepper and mix in. You can leave your burgers plain but I like to add some spices or herbs: add your herb/spice of choice, mix in and leave for 30mins to 1 hour for the flavours to mingle and then form the meat into three equal patties with your hands. You just need to squash and shape it and it will hold together fine. Aim for about 2cm thick and don’t worry if its not perfectly flat.

Pour some cooking oil onto a plate and coat each burger with oil by putting it on the plate and moving it about a bit on each side (don’t worry about the edges, just the flat surfaces).

Heat your chosen pan, a griddle plan will give you nice seared lines but a frying pan is fine. You don’t need any oil in the pan as you’ve already oiled the burger. When the pan is nice and hot put the burgers in. Turn the heat down about ¼ – ½ way. Leave the burgers alone to cook. After about 2-3 minutes they will be ready to flip and they will come away from the pan easily. Turn them over and leave again. This will give you medium-rare/medium burgers; cook for longer if you wish.

Serve on the buns with the condiments and side dishes of your choice.

Good spice/herb combinations are (picking just one usually works best). Use 1 tsp of spices (ready or freshly ground) or dried herbs and up to 1 tbsp of fresh chopped herbs:

Beef: chilli flakes or fresh chilli, coriander seeds or leaves, English mustard powder

Lamb: cumin seeds, coriander seeds, mint, oregano, rosemary

Pork: sage, smoky paprika

Think about how different cuisines spice their food and you’ll find plenty more options.

Feeding time at the sourdough zoo

A little while back I set a sourdough starter running. The first ten days to two weeks you are just supposed to leave the mix of flour water and grapes to get on with doing its own thing although the urge to peek, tweet and blog about progress got the better of me. In the process I experienced the joys of seeing the starter come to life and also its unique and pungent smell!


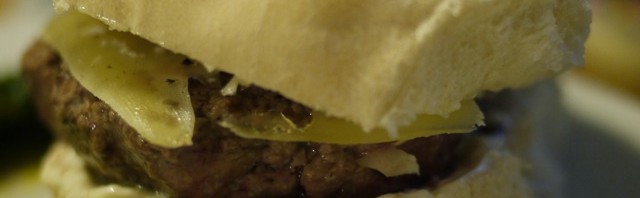
After 10 days it was time then time to start the daily feeding routine. This involves feeding the starter twice daily with flour and water. It becomes a regular routine but it too has its interesting nuances and moments of both joy and concern.
So what happens? Well first of all you get rid of the grapes.
Remove them from the starter:


Squeeze any remaining juices from them back into the starter. And discard, their work is done: 


Tip away about 1/3 of the mixture (roughly 4-500ml):


Then top up with 250150ml of water and 150100g of flour. Mix it in and pop the lid back on.  

Everyday, twice a day, you discard 200ml of the mix and add 150ml of water and 100g of flour. You do this for TWO WHOLE WEEKS. It gets a bit monotonous. Then you start to worry, when after a few days, nothing seems to be happening, there might be a few bubbles but not much, the smell is much less (which is nice, but also makes you wonder if all is on track). Each time you lift the lid the flour will have settled out and so you need to stir the mix to get a lovely wallpaper paste type consistency before you discard 200ml. Oh and if you are thinking this discarding is wasteful, well maybe, but do the maths and you’ll see that you’ll have gallons of the stuff if you just keep adding water and flour and not getting rid of any – which is fine if you are planning on starting a bakery but not if you’re simply hoping to make some tasty bread for home consumption.

After about a week of not much happening, and egged on by Dan at FoodUrchin (he’s about two months ahead of me in the sourdough game), I dared to taste the starter. WOW. Its sort of like sherbet fizz stuff – this is the progress we need. We are on track.

In the second week of feeding the starter got lots more active with a good thick yeasty top each time it was feeding time. This might have been temperature fluctuations as well as the starter getting going because week one of feeding was pretty cool and week two we had what, by UK standards for May, was almost a heat wave. At each feeding your stir the yeasty topping back in before discarding some.

At last, at the end of two weeks feeding, preceded by two weeks of waiting/peeking, there was a starter that looked good and active.

It was time to move to baking bread…….but that’s another story.


Under the bonnet: Sourdough progress

On Sunday Monday I finally decided to make a sourdough starter. It takes FOUR weeks of patient waiting and ‘feeding’ before you get to make a loaf.


Blimey.

I’m not a patient person so each time I pass I have to try very hard to resist taking a peek to see what’s happening under the lid. Sometimes I just manage to leave it alone others I succumb. So I thought I’d share these peeks with you so you too can live the joys and worries of making sourdough.

I’ll keep updating this post so come back if you want to see what’s a foot – or follow me on Twitter to hear the latest. As I add new pictures they’ll be right here so you’ll need to scroll down if you want to watch the full process.

Update 6 (above): Well the yeasty foam is disappearing day by day to reveal the pinky brown cloudy liquid – nice. The smell is just as bad each time I lift the lid – so I’m mostly staying away. Feeding commences Friday 8.00am BST so have stocked up on flour and am ready to enter phase 2 with my sourdough – can hardly wait. Date/time: 13 May 2009 2.00pm BST

Update 5 (above): its now been just over a week since I made the sourdough thing (yes its a thing). I tried not to peek too much this weekend as we had guests and I imagined they might not want to feel like they were visiting an unattended football teams sock laundry pile! Anyway today the starter is looking rather sad. Its getting a bit of the promised pink tinge but the thick yeasty foam is collapsing and glimpses of dirty looking liquid can be seen below. Ugh. Only a few more days before the phase 2 feeding ritual commences….Date/time: 11 May 23.00 BST

Update 4 (above): just clocked through 100 hours of bubbling (and waiting). Its getting smellier but so far this isn’t creeping out to fill the kitchen (a good fitting lid is clearly essential). Here’s more of a close up on all that home grown yeasty-ness. Date/time: 9 May 2009 9.30am BST

Update 3: We are now 3 1/2 days in and its smelling like a VERY ripe cheese (but still only if you lift the lid). It doesn’t look much different from yesterday so I decide to prod it with a spoon. I can tell its liquidy underneath with a thick sticky stretchy topping. Still yellow-ish coloured. This is where may patience is going to be tested severely I think…..Date/time: 8 May 2009 8.00am BST

Update 2: At 60 hours its going a bit crazy, lots of bubbling, bit more smelly and I’m worried its going to break free from the bowl: Date and time 7 May 2009 9.30am BST


First up: 36 hours old, yellowy colour, flour has settled to bottom, slightly tangy smell starting to develop (but only if you lift the lid): Date and time 6 May 2009 9.15am BST

For starters: thats sourdough starters

I love sourdough bread in all its varieties and I’ve always quite fancied making it myself. Looking around some of my favourite food blogs recently I saw that sourdough is of those things people are trying out – maybe its the credit crunch that makes us all want to bake bread, I don’t know, but it certainly seems to be on the rise (!).


A  bit of looking about, a bit of tweeting and it seemed that the king (and queen) of sourdough recipes comes from Sam and Sam Clarks ‘Moro’ cookbook. It doesn’t seem hard (or maybe it is and I’m just about to find that out) but it requires patience – lots of it – four weeks of it. Like WHAT – I’ve got to wait FOUR weeks before I can even get close to baking a loaf….now I’m not especially renowned for my patience so I decided to go off and look for other starter recipes. But I kept drawing a blank – they seemed too short and they had easy blend yeast in them – like right that’s not real sourdough its just a minor tongue tingle effect.

So back to the recipe from ‘Moro’ and a whole lot of patience.


Here’s what you need and do:


1 bunch of red organic grapes (okay so these aren’t organic but I hope it still works)

Strong white organic flour: 500g

Water: 1 litre
Put the grapes in a muslin bag and secure the top of the bag – just so:
Mix the flour and water together to create a sloppy batter that looks like this:

Bash the grapes around a bit with a rolling pin and remember to save the juices to add the mix.

Having added the juice in go the grapes:

Cover and now its just a waiting game – two weeks and counting to next stage……