Seville oranges: spicy, savoury style marmalade

Last year when everyone was making marmalade with seville oranges I bought a couple of bags from the supermarket thinking I’d join in the fun.

Then I remembered that the last batch I made had lasted about 10 years as I don’t really eat marmalade that often.

So I wondered if there were any more savoury recipes…I’m a fan of chutney and pickles and started thinking along those lines. I couldn’t find any specific recipes and several people I asked were unsure if it would work.

After a bit of juggling ideas I decided to give it a go and try to make a sort of spicy seville and onion marmalade hybrid.

With no recipes to guide me I struck out and just made it up as I went along. Naturally I also failed to write down what I did.

Possibly more inevitably, almost 12 months later, when I opened the first jar to test it just before Christmas it was amazing. Mellow spices, sweet and orangey but with enough sharp tang and bite.

So here I am staring at the pictures I took hoping I can work out what I did.

I think its fairly simple.

It roughly goes like this:

Ingredients:

Seville oranges

Onions

Chilli peppers

Dried smokey chillis

Coriander seeds

Fresh ginger

Method:

Juice the sevilles and set aside the juice. Slice the peel into strips.

Slice the onions. Cook the onions slowly in butter over a low heat to soften them.

Add the sliced peel, juice, spices and a some cider vinegar.

Simmer until soft and thickening and reduced by about half.

Put in sterilised jars and seal straightaway while warm.

Leave for ages to allow it to mellow.

Eat, with cold cuts or with poppadums…or just however you would normally have spiced chutney.

Festive menu, part 3 (all about chestnuts)

Yesterday I told you about the cheese terrine we had for starters today its all about the chestnuts…mainly so you can make the chestnut stuffing from my festive menu but also so I can share my most recent blog for Francoise Murat Design on Christmassy foods and which also includes a fab chestnut jam and a chocolatey chestnut cake…so here it is….. (first posted 8 December the cakes are actually made now!)

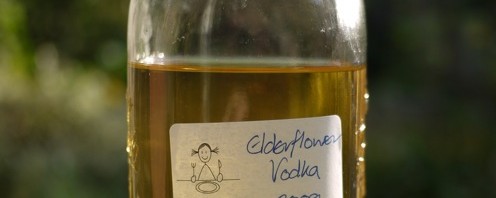
One of the wonderful things about Christmas is the fact that there are lots of chances to cook up delicious meals and food gifts for friends and family. Some people will have started their Christmas preparation months ago baking Christmas cakes which are now slowly being ‘fed’ brandy or whisky to make them extra moist and tasty ahead of being decorated. I’m not quite that organised although I have ear marked some of my chutneys, pickles, fruit vodkas and vinegars as gifts and I’m planning on making lavender shortbreads and perhaps cheese biscuits too. The fruit is now soaking in whisky ready to make the cakes and I think I might try my hand at some home cured gravadlax.

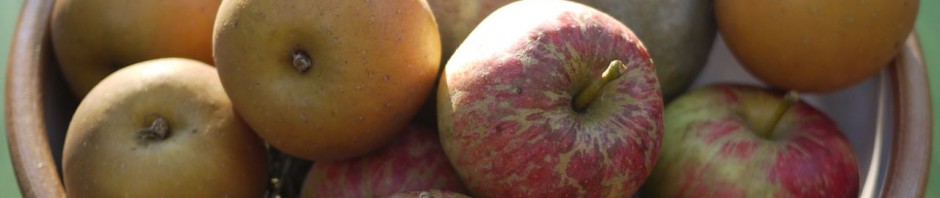
For lots of people the big decision is what meat to have for the Christmas meal, should it be turkey or the supposedly more traditional goose, a classic English roast beef or perhaps a stuffed loin of pork. For me though it’s all about the trimmings and the other meals, the roast is almost irrelevant. I’ve often joked that you could easily serve me a plate piled with all the trimmings and I wouldn’t notice if the roast meat was missing. I just love the extras so much and they are the things that most of us only decide to do for Christmas…..stuffings, bread sauce, fruit jelly, sausages wrapped in bacon, about 5 types of vegetables all with little twists, proper gravy made from real stock, tons of crispy roast potatoes…we might do some of these some of the time but we almost never do so many together and of course that’s just the ‘main’ course…there will be a starter when perhaps normally there wouldn’t, there’ll be dessert and mince pies and cake and then somewhere in all this there’ll be a groaning table of cold cuts, pates, pork pies, cheeses, breads, smoked salmon following by an array of cheesecake, trifle, gooey chocolate cake…and lots of citrus fruit too to balance it all out.

My particular favourites are homemade mince pies with proper crumbly delicate pastry, baked ham, the sausages wrapped in bacon, roasted root vegetables, braised cabbage with lardons and a splash of white wine, chestnuts tossed with Brussels sprouts and butter, super crispy roast potatoes. Give me those over the festive period and I’ll be happy but there is one thing that that I wouldn’t ever go without at Christmas regardless of what else I chose to cook and that’s chestnut stuffing. Even if I’m not having turkey or chicken or pork I still make some in a sort of terrine style and eat it with chutney or pickle or as a sandwich filling. I love it, it’s the stuffing we always had at Christmas when I was growing up, so it’s a Christmas must (the recipe is from my Grandma). Its tasty and moist without being heavy, lots of stuffing’s use pork mince, which makes them very rich. This is simpler and with a little adaptation could easily be made into a fantastic vegetarian version as a terrine.

I really like chestnuts, their sweet mealiness lends itself well to a range of different dishes, savoury and sweet. They are good in wintery stews particularly with game. They are delicious roasted and eaten straight from the skins. And they work in cakes and breads, particularly with chocolate but they also have a long heritage as a flour substitute in southern Europe.  When I was doing a trial batch of the stuffing last week for this blog post I also decided to play around with some other chestnut ideas so as well as a stuffing I think everyone will like, for chestnut fans I’ve a chestnut jam recipe and also a chocolate and chestnut cake. So stop worrying about whether to have turkey, goose or beef, focus on the extras and I’ll bet almost no one notices which roast you serve.

Chestnut Stuffing

The way I like to cook means this recipe is just a starting point, pick your favourite herbs to go in the mix, don’t use bacon if you want a vegetarian version and perhaps add gently softened onions instead (or even as well if you like).

  • 1 tin chestnut puree
  • 8 oz breadcrumbs
  • 3 rashers streaky bacon cut into small pieces
  • zest 1 lemon (and the juice if you like)
  • 2 medium eggs, beaten
  • big handful of fresh parsley, chopped
  • 1 tbsp of fresh thyme
  • salt and pepper

Break up the chestnut puree with a fork; add all the ingredients except the eggs and mix. Once mixed add the egg and bring together. Use to stuff turkey, chicken or loin of pork. Bake any you can’t fit in the meat in a dish or terrine. You can line this with streaky bacon and fold over the top or simply dot the top with butter. Cook the extra stuffing for at least 40 mins at R6 (200C), you may need to cover the top with foil half way through the cooking time.
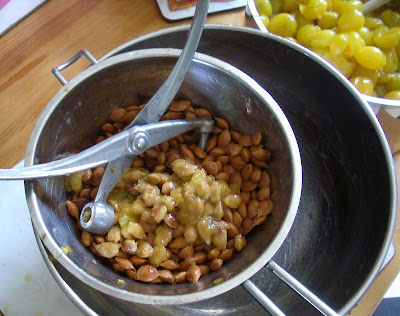
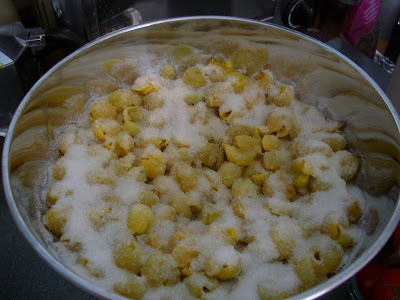
Chestnut Jam

  • 2 tins of whole cooked chestnuts (i.e. 400g) or whatever weight you have of cooked peeled chestnuts
  • For each 100g of chestnuts you need 75ml water and 100g of sugar
  • Lemon zest
  • Vanilla pod

Put the chestnuts in a pan and add the water, the lemon zest and the vanilla, simmer gently for 30 mins (covered) to allow the flavours to infuse. Drain but retain the liquid and top back up to the 75ml per 100g weight of chestnuts using either water or brandy. Push the chestnuts through a fine sieve then add back to the liquid. Bring to the boil and simmer until thick and when a drop is put on a cold plate in the fridge for a few minutes it forms a skin and is a jam consistency. Put in warm sterilised jars and seal. It’s great on toast, especially sourdough and can be used with chocolate cake (see below).

Chocolate Chestnut Cake

I was inspired by a whole range of ideas when I came up with this recipe: from Mont Blanc, various brownie recipes, Nesselrode pudding to a store cupboard cake of Nigella’s that uses jam or marmalade with chocolate…..

  • 100g of 100% cacao (grated), I used Willie’s Supreme Cacao Peruvian Black, San Martin
  • 300g of chestnut jam (see previous recipe, you can also buy online)
  • 150g sugar (or 150g more chestnut jam, this is what I used)
  • 125g unsalted butter
  • 2 large eggs beaten
  • 150g self raising flour
  • round cake tin (20cm) or better still a brownie tray, lined with silicon paper

Melt the butter in a bain-marie then add the cacao and allow this to melt and stir to mix as the cacao melts. Remove from heat and add the chestnut jam, mixing well, then add the sugar (if using) and eggs. When its all well combined add the flour a heaped tablespoonful at a time and mix. Pour into the cake or brownie tin and bake at R4 (180C) for at least 50 mins and a skewer comes out clean. My cake was very deep as it was in an 18cm tin and so it took and hour and half to bake, in a brownie tin it will take much less so start checking from 35 minutes and adjust cooking time accordingly. Leave in the tray/tin for 15 mins to cool and then remove.

I served the cake sliced like a Victoria sponge and filled with more of the chestnut jam and whipped cream, topped with whipped cream and sprinkled with crushed meringues. As the cake was so deep this made it rather difficult to eat and it collapsed so I think doing it brownie style and topping with the jam, cream and meringues would be more effective.

Gluts of all types

It’s coming to the end of harvest time but everywhere you look there are gluts of produce to be turned into something delicious. Some to be eaten now, some to be saved for the winter months. Gardens and hedgerows are filled with bounty and will continue to provide opportunities to harvest interesting things until late October. You might have your own fruit trees providing you with an abundance of apples, pears, plums or damsons, too many beans, courgettes or unripe tomatoes. Maybe a neighbour has a surfeit they need to share. There’s sure to be produce by peoples gates either for free or very cheap. And of course you can go foraging in country lanes, in parks and open spaces, on moorland.

Whatever you find there’s plenty of ways to put it to good use: cakes, crumbles, pies and tarts for now, freezing and multiple ways of preserving for later…..compots, jams, chutneys, pickles, curds, vinegars, favoured gins or vodkas, fruit jellies and cheeses, cordials, wines and ales, ketchups and sauces. Almost too may choices.

First of all some rules of foraging:

  1. Be sure you are allowed to forage from the lane/park/open space you choose; land maybe protected or private, foraging isn’t just a free for all.
  2. Don’t strip plants bare, leave fruit for others and for the wildlife.
  3. Make sure you know what you have collected before using it as food.
  4. Only collect from areas where you are happy there won’t be contamination, so right next to a busy road might not be great.
  5. Always be considerate and sensible about where and how you forage.

The are some good books on foraging to help you know what you might find where and when and also for identification. Three that I particularly like are Food for Free by Richard Mabey (it comes is a tiny pocket size so is easy to carry with you); The Foragers Handbook by Miles Irving more a research book for at home, Miles also runs foraging courses (as do others); and the River Cottage Hedgerow Handbook by John Wright.

Most of what you’ll collect over the next two months will be fruits and berries of some description, but there could be end of season vegetables too from the garden. There’s mushrooms to be had of course but that’s a whole other topic. To decide what to do with whatever glut you have think about the following: how ripe is the fruit, how sweet or tart is it, how long is the season (is this the last for this year or might you be able to collect more), how much do you have? All of these things will influence what you might choose to do. If you have a small amount of ripe fruit then if its edible uncooked you’ll probably want to eat it as is with cream or yoghurt or perhaps made into a cake, pudding, tart or crumble. If you’ve a lot of something then you’ll need to preserve some for later use either as a jam, jelly, chutney, pickle or something. I tend to make pickles, chutneys and fruit vodkas because they are what I like but think of what is most likely to get eaten up before next years glut and also what people you know will appreciate as presents. If the fruit is less ripe then pickles and chutneys are a good choice as the sourness is part of the taste and can be balanced by the spices and sugar. Very under ripe fruit can be made into Indian style pickles (a bit like lime pickle), I’ve tried this with plums and green tomatoes and it works well with both.

There really are so many choices it’s hard to single out one recipe (but I’ve included lots of links this month for you). Good resources are River Cottage Preserves Handbook by Pam Corbin and The Jam, Preserves and Chutneys Handbook by Marguerite Patten. Both are excellent on basic techniques with plenty of recipes to try. Do remember that if you are making chutney or pickles then you need a non-reactive pan (i.e. not aluminium) and inevitably the vinegar evaporates so have the extractor on and close the kitchen door, the taste though, is worth it.

One thing I’m determined to try this year is drying fruit. I love the dried berries and apples in granola and muesli so I’m going to make my own. I’ll be following this method from a curious little book called They Can’t Ration These, written during WW2 by Vitcome de Maudit (and republished by Persephone) its fully of quirky ideas for foraging and cooking.

How to Dry Berries

Use only sound, unbruised fruit, wash, clean and drain the berries on wooden or iron sheets and place them in a very moderate oven (110F). Raise the heat gradually to 130F, then when the berries fail to stain the hand when pressed but are not so hard that they will rattle, take them out and store. The length of time for the drying varies with the kind of berries, but it is from 4 to 6 hours.

(Note: The temperatures quoted don’t seem to tally with any conversion charts I can find so I’m assuming that the oven should be on its lowest possible setting. This is part of the joy of old recipes.)

This article was first published as part of the series I write for Francoise Murat & Associates newsletter. If you want to get the article sooner then why not subscribe to the newsletter which also has features on gardening (including kitchen gardens) and interior design.

Spicy sour green pickles

So the tomatoes should have been ripe ages ago but mine still look like this:

Which means I’ll be making batches of green pickles again this year. But that’s okay because I rather like the green pickles. I made them first with under ripe plums that I collected in deepest Suffolk with Vivia of Grethic’s Grethica. She also tracked down some recipes which she posted links to here. Its worth watching the you tube clips because they are a bit bonkers but to make it a bit easier I’ve given the recipe the way I did it here.

You need:

Lots of unripe tomatoes or plums

Sour pickle:

1 quantity (see note) each of fenugreek seeds, mustard seeds, red chilli flakes, cumin seeds, coriander seeds

½ quantity of salt

¼ quantity of tumeric

rapeseed oil

Sweet and sour pickle:

8% salt

4% tumeric

50% sugar

rapeseed oil

In both cases the quantities take a bit of guess work. In the second one I assumed it meant use 8% of the weight of fruit you have etc. In the first one it was harder so I just did what looked like a sensible quantity for the fruit I had the get a good level of spiciness.

This is what you do:

Cut the tomatoes (or plums) into quarters. Discard the stones if you have plums. I usually make one batch of each type so I split the total fruit in half then carry on.

Sour pickle:

Mix the spice and salt together in a bowl. Add the fruit and coat with the mix. Cover with cling film and leave somewhere light and warm for 3-4 days. Pack tightly in sterilised jars and cover with rapeseed oil. Leave it to mature for at least a month. This one is quite like lime pickle so is great with curries. I use any leftover spicy oil for cooking curry as well.

Sweet and sour pickle:

Mix the salt and tumeric together and add the fruit. Coat. Cover with clingfilm and leave in a bright warm place for 2-3 days. Add the sugar and leave for a further 3-5 days. Pack into sterilised jars and cover with oil. As this one is sweeter it also works well with cheeses or cold meats.

Here is what you end up with:

Elderflower rush

Its very nearly the end of the the elderflowers for this year, in fact in some parts of the country I’m sure they are already gone gone gone. But in a few places there are still some good ones to be found so if you are quick you might be able to grab a few flower heads and make cordial, champagne or…guess what……yes flavoured vodka.

Somehow I seem to have gathered a reputation for all things flavoured voddy and a few people have asked for the method for doing an elderflower one. So here it is:

6-8 good size elderflower heads in full bloom
750ml – 1l of vodka – basic supermarket is fine
250g-300g granulated sugar
a large glass jar or a s/steel pan will do

Make sure there are no bugs on the elderflowers.
Put the sugar then the flower heads in the jar or pan.
Pour over the vodka. I don’t use citric acid like you are supposed to in the cordial because I don’t think you need it here.
Stir.
Cover.
Leave to steep for at least a week preferably three. It will go a very pale sand colour. Or possibly look like ditchwater. This is okay
Stir or shake if the jar has a good seal regularly to help the sugar dissolve.
Strain either just with a sieve (so expect a bit of debris) or through muslin/coffee filter for a clearer result.
Bottle.
Leave to mature for at least 4 weeks or longer, the longer you leave it the mellower it gets but as elderflower is delicate you don’t want to leave it for ages, sloes and damsons can mature for a couple of years and get better but this would lose its flavour.
Drink straight. Use as a mixer like you would cassis. Or give it as gifts if you make loads.

Here’s a blog post with my more general method and tips for flavoured voddies:

http://withknifeandfork.com/a-peek-in-the-pantry

In season: blackberries

Last weekend the twitter wires were buzzing with foodies claiming to have found superbly ripe blackberries in and around London. Seemed a little early to me but people were twitpic-ing them and they looked good. I was still doubtful but thought I’d take a chance and see what I could find. 

oops i spilt some!
oops I spilt some!

We found loads and loads and loads and loads of bramble bushes and plenty of smallish under ripe blackberries. No big fat juicy ones as other claimed to have found. I was beginning to think perhaps they were all having me on and had been foraging at their local supermarket…..

I wasn’t prepared to give up – I had empty bags to fill so after a bit more searching we settled on a spot and started to pick the best we could find moving on bit by bit to take the ripest ones and leaves the others for another day. We eventually collected about 1.5lbs – not a lot but I think another week or so and there will be a much better haul. We only saw one other person collecting and the bushes didn’t look like someone else had got there first and baggged all the plumpest ones. We did see plenty of people soaking up the sun, having picnics and larking about on the boating lake but no one was interested in blackberries.

So then I needed to decide what to do with the fruits. I wasn’t sure they were sweetish but a bit small to make a dessert with and it was too warm for crumble. So I rinsed them let them dry off and popped them in the fridge whilst I spooled recipes round in my head. then at breakfast one day when I was enjoyed some of Ginger Gourmand’s Lemon Curd (bought from her UKFBA stall a couple of weeks back) it came to me:

BLACKBERRY CURD :)

Genius I thought – tart berries and sweet butteriness what a combination. So back to the recipe books to find a recipe – well could I find one, no I could not and I’ve got at least four books on making preserves……it was time to freeform a recipe. A bit of detailed reading and I decided I that adapting a recipe for gooseberry curd would probably work. Here’s what I did:

Goodshoeday’s Blackberry Curd – makes 4 small jars

700g tart blackberries – rinsed and picked over for bugs and leaves
80ml water

Put the blackberries in a pan and add the water, bring to a simmer and cook for 15 minutes until they form a puree. Rub through a  sieve (preferably nylon) so you get as much of the juice and fruit as you can but no pips. Measure the volume of juicy pipless puree you now have. I got 350ml.

For each 200ml of puree you need 1 large egg or 2 yolks, 150g of sugar (caster) and 40g of unsalted butter (plus maybe more see later).

So I used 70g of butter, 2 medium eggs, and 260g of sugar as the nearest sensible equivalents.

Put the puree sugar and butter in a heatproof bowl and warm it over a pan of hot water, stirring until it melts/dissolves. Beat the eggs thoroughly and then add them to the blackberry mix, keep stirring over the hot water until it all thickens and coats the back of a spoon like a good cheese sauce would i.e. still a bit runny as it will thicken as it cools. Mine seemed a bit runny do I added about another 10/15g of butter (I didn’t weigh it I just added small pieces until I got the desired effect).

Then pout into hot stertilsed jars trying to avoid getting it all down the jars and on the work surface like I did (new narrower jam funnel needed for me I think). Lids on jars and leave to cool before storing in the fridge.

Remember to lick the spoon thoroughly and barter hard with anyone who tries to blag a jar because it tastes really good.

Recipe based on Gooseberry Curd by Marguerite Patten in The Basic Basics Jams, Preserves and Chutneys Handbook

An unexpected glut of cherry plums

Of what? Of cherry plums. What are they then?

The simple answer is they are plums that look like cherries and the trees can be found planted in many a street and garden mostly across the southern half of the country.

But you want to know more than that don’t you? Well then if you are sitting comfortably I shall begin.

© Danielle Harlow – Fotolia.com

We’ve lived in our house for nearly 12 years and when we arrived the garden was a bit ramshackle. It had been nice at one point I’m sure but the previous owner was rather old (he had lived his whole life in the house) and it had been left to get overgrown. Both garden and house were in need of a LOT of work. It was a great chance to start from scratch and not have to live with someone else’s idea of the ‘perfect’ terraced house. So we set to work. It took the best part of 8 years for the house to be completely finished and a bit like the Forth Bridge it’s now time to start decorating all over again (no walls to re-plaster though this time).

But I digress.

We have also made plenty of changes to the garden. Sadly the greenhouse hidden at the end was too rotten to save and the pond a little too large to look after. So they went. There were plants that were past their prime or couldn’t survive the severe trim they needed and others we didn’t know what to do with (or didn’t like – pampas grass anyone!). One of these was a quite young looking tree that didn’t show much promise; it was bolting for the light through the trees in our neighbours’ garden. The initial decision was that it would probably have to go. But we didn’t get round to it and then it was February and the tree came into blossom way before anything else giving a wonderful feeling of the approaching spring and providing some brightness in a wintery garden.    


The tree in blossom earlier this year


So it stayed. And each year the blossom has been wonderful, sometimes as early as January but never later than the end of February. The blossom is white and because it comes so early I started to assume maybe it was some kind of almond tree.Then we started to get fruit, not many at first and often hard and green with a small stone. It didn’t really look like an almond and I never got very far in trying to find out what it was.  


Plums on the tree in mid June

Then this year I became determined to find out what it was. I was spurred on by my day of wild food foraging but it wasn’t until I got a copy of The Forager Handbook (thanks @RachieGraham) that I was finally able to work out what it was. Some cross checking on the internet to confirm and just as the fruits started to be ready I knew at last that it is a cherry plum and that it is edible. And this year there seemed to be quite a lot of fruit.


Just some of the haul

So I started to collect the fruit, and I carried on collecting them, and on and on and on and on and on. And over about 3 days I collected about 15kg (I lost count somewhere I think). And then I needed to process them because eating 15kg of fruit straight off was not going to be a good idea. A couple of tweets later and I had recipes for pickled plums (thanks to @Weezos) and plum chutney (thanks to @TheAmpleCook) and some possible giveaways that in the end couldn’t be managed. Naturally I already had in mind some of my almost legendary fruit vodka so I got to work. Oh my and what work it was.    


Bucolic England (Flatford Mill, 2007. copyright Jonathan Taylor (Flickr user Northstander)

When I was a ‘corporate slave’ I harboured dreams of having a little chutney and preserves business, because when you sit at a desk most of the day building spreadsheet models, writing reports and trying to keep 150 very nice solicitors in check your mind roams off into bucolic styled dreams of country England and domestic pursuits such as baking bread and making chutneys. Every now and then I would rustle up a batch of some kind of chutney and dish it out to delighted friends and family – it all seemed such fun. Well let me tell you its not so much fun if you have to do it day in day out. And I say that after only 2 ½ days of plum processing! I reckon that each kilo of plums equated to about 180 actual plums.    


Just some of the 2700 plums I stoned

So I’ve stoned 2,700 plums BY HAND. I’m surprised I haven’t developed RSI. And the thing is I reckon I only got about ¼ of the total possible harvest…why? Well the tree is against our fence so half of the branches are over next-door’s garden so there’s 50% I didn’t get and then I was only collecting those that fell and were in good condition and weren’t under a prickly shrub. I took a peak under one of the shrubs and there were loads more under there so I reckon I lost another 25% that way (of the total not of the remainder – see what all those years with spreadsheets did to me). So I guess the tree had roughly 60kg of fruit on – not bad for what used to be a gangly upstart that we nearly got rid of. 

Now I have pickled plums, plum chutney, plum vodka, plum compote, bottled plums (in sweet syrup) and I’m still collecting about 500g a day……more vodka with them I think as that’s the easiest to make.    


Here’s the final haul


So if you’ve got a plum or damson tree watch out because I think it’s going to be a bumper summer. And if you’ve not well then don’t go too mad at the fruit farm 2½ days of fruit processing is more than enough for anyone.

Here’s some ways to deal with your own fruit glut. I’d also recommend The River Cottage Preserves Handbook for good ideas.     

My Legendary Fruit Vodka


I don’t use fixed measure for this but ratios.

Select your fruit of choice and weigh it. They tip it in a large glass jar (e.g. a preserving jar with a clip lid).
Add between half to the same weight of sugar (I usually used granulated) depending on how tart the fruit is and how sweet you want the result to be.
Then pour over about 1 ¼ -1 ½ times the volume of vodka as you had weight of fruit; so if you had a 750ml bottle of vodka you’d be looking to find between 500-600g of fruit.
Add any extras you think you’d like, a shaving of lemon peel is good with damsons or sloes.
Stir it all round to get as much as the sugar to dissolve as possible.
Close the jar and leave for a minimum of 6 weeks.
Check regularly and shake to help the sugar dissolve. After the first 6 weeks test the flavour and either leave to extract more flavour or strain and bottle.
Leave the bottle to mature for a further few months minimum. It gets better with age if you can resist for long enough.

Tips:
    

  • If you haven’t got a large glass jar but have a glut of fruit you need to use up quickly then put everything a big non-reactive pan, cover and then track down a jar – it’ll be fine for the first few weeks in a pan.
  • You can use gin instead of vodka but remember gin already contains its own aromatics so you’ll get a different flavour. Sloes and damsons work particularly well with gin.
  • If the fruit is quite hard then you need to break the skin to allow the flavours to mix – I do this by putting the fruit in a large freezer bag and bashing it a bit with the rolling pin. If you’ve stoned the fruit (or its a soft fruit) then there’s no need to do this.
  • You might want to strain through muslin or even a coffee filter before bottling if you want a really clear result. If you don’t mind sediment there’s no need to bother.
  • Be wise whom you share the vodka with; once people have tried some they’ll always be angling for another bottle.


Plum Pickle (adapted from a series of Tweets by Weezos)


1kg plums
1ltr wine vinegar
500g sugar
100g salt
spices of your choice

Salting the plums

Stone the plums and place them in bowl sprinkling salt over each layer as you go. Leave for 12-24 hours.
Sterilise glass jars in an oven for 10 minutes at R2/150C and leave to cool.
Bring the vinegar, sugar and spices to the boil and simmer for 5 minutes. Allow to cool.
Rinse the salt from the plums and pack in jars. Cover with pickling vinegar.
Seal and allow to mature for a minimum of two weeks (longer is better) in a cool place.
Good with terrines and game dishes.     

Spiced Plum Chutney (thanks to TheAmpleCook)


Nearly ready for the jars


This recipe is from Delia Smith.

3lb plums
1lb apples
3 onions
3 cloves garlic
2 heaped tsp ginger
1lb seedless raisins
1lb soft dark sugar
1lb Demerara sugar
1 pint vinegar (recipe says malt I used cider)
2 tbsp salt
2 cinnamon sticks
1oz allspice berries
1 dsp whole cloves
large non-reactive pan
6 jars

Note: you can adapt the spices to a mix of your favourites but you need roughly the same quantity, for example I had a smoked chilli in mine, and coriander because I like them.

Put the spices in a muslin square and tie it tightly with string.
Stone the plums, finely chop the apples (cored but leave on the skins), finely chop the onions and put them all in a large pan.
Crush the garlic and add it, the raisins, ginger, sugars and vinegar to the pan. Sprinkle in the salt and stir well.
Suspend the whole spices in their ‘bag’ into the pan and tie to the handle for easy removal later.
Bring to the boil and then simmer pour about 3 hours until the vinegar has almost disappeared and you have a thick, soft chutney. Remember to stir occasionally to prevent sticking.
Sterilise the jars and fill whilst both they and the chutney are still warm.
Leave to mature in a cool place for a minimum of 3 months.