Seville oranges: spicy, savoury style marmalade

Last year when everyone was making marmalade with seville oranges I bought a couple of bags from the supermarket thinking I’d join in the fun.

Then I remembered that the last batch I made had lasted about 10 years as I don’t really eat marmalade that often.

So I wondered if there were any more savoury recipes…I’m a fan of chutney and pickles and started thinking along those lines. I couldn’t find any specific recipes and several people I asked were unsure if it would work.

After a bit of juggling ideas I decided to give it a go and try to make a sort of spicy seville and onion marmalade hybrid.

With no recipes to guide me I struck out and just made it up as I went along. Naturally I also failed to write down what I did.

Possibly more inevitably, almost 12 months later, when I opened the first jar to test it just before Christmas it was amazing. Mellow spices, sweet and orangey but with enough sharp tang and bite.

So here I am staring at the pictures I took hoping I can work out what I did.

I think its fairly simple.

It roughly goes like this:

Ingredients:

Seville oranges

Onions

Chilli peppers

Dried smokey chillis

Coriander seeds

Fresh ginger

Method:

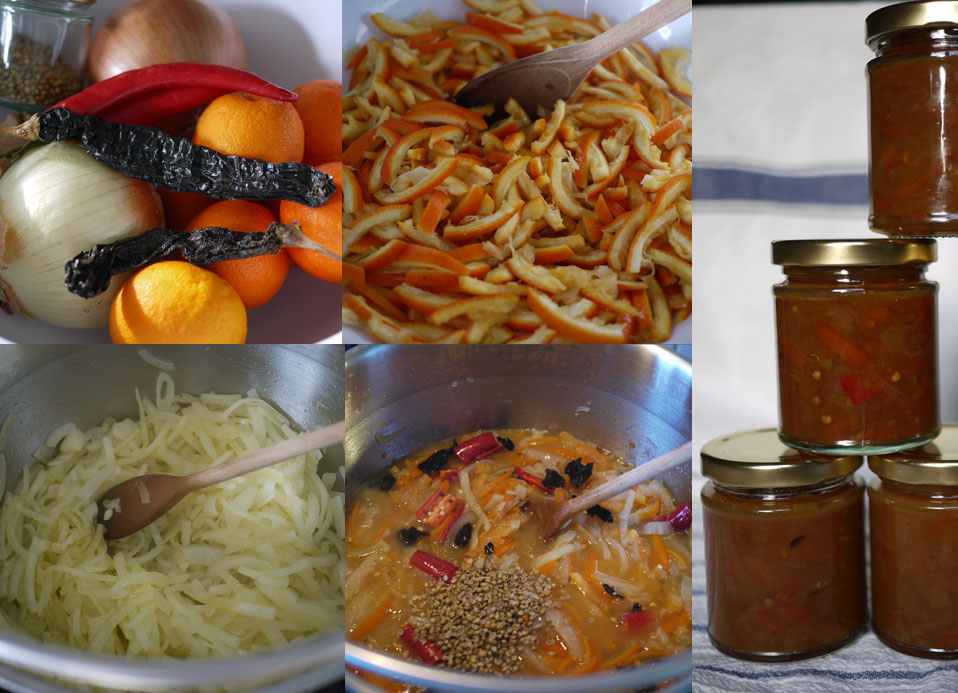
Juice the sevilles and set aside the juice. Slice the peel into strips.

Slice the onions. Cook the onions slowly in butter over a low heat to soften them.

Add the sliced peel, juice, spices and a some cider vinegar.

Simmer until soft and thickening and reduced by about half.

Put in sterilised jars and seal straightaway while warm.

Leave for ages to allow it to mellow.

Eat, with cold cuts or with poppadums…or just however you would normally have spiced chutney.
Threes P’s Risotto and guest posting

I’ve been doing my regular post for Francoise Murat’s newsletter for a while now but recently I was asked to do a guest post for fellow blogger Jo, of Jo’s Kitchen, whilst she was away. So I thought why not its always fun to do a bit of writing elsewhere.

Here’s what I came up with for her….

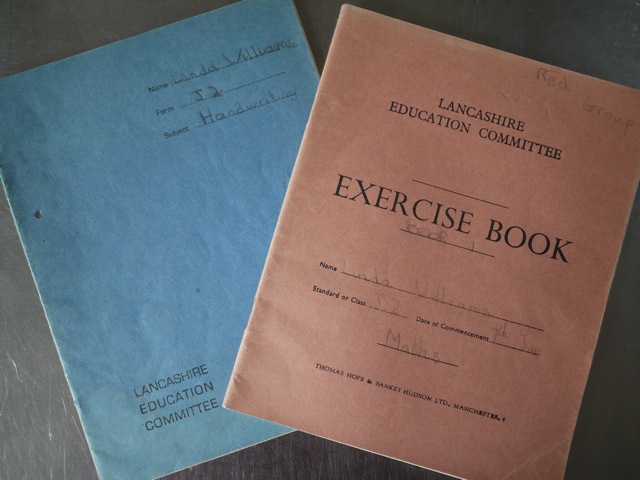
With monotonous regularity someone somewhere will go on about how an education system founded in “the 3 Rs” is just what we need to get back to basics and raise standards. Its always worried me a little that these three R’s don’t all start with “R”, hasn’t anyone but me spotted or is it phonetics for adults. Perhaps, despite the huff and puff that is was better in the past, its assumed those basics didn’t ever get through and so none of us know that only Reading actually begins with the letter R and that wRiting and aRithmetic start with other letters than “R”. Granted the “W” in wRiting is pretty silent in pronunciation but the “A” in ARithmetic isn’t, although there is an argument the R is for ‘Reckoning’ not ‘aRithmetic’. But the fundamental point of the three R’s is: get the basics right and all the rest will follow as day follows night. There is at least a grain of truth….. click here to read more over at Jo’s Kitchen blog …..and you get to see inside the exercise books!

Making chocolate: an experiment

A few weeks back Julia at ‘A Slice of Cherry Pie‘ was offering 5 Mayan Magic Chocolate kits to food bloggers who promised to blog the experience. Sounded like fun and as I love chocolate I rushed in and bagged one. It arrived a few days later but it sat untouched for a while – I was busy and wanted to do it justice and also blog as much of each step as I could…..so here is what you get and do:


1. The kit:

2. What’s inside:


3. The butters:

4. The powders:

5. My chosen flavours (lavender, cardamom, lemon zest). I hardly used any of each:
6. The butter ready to melt in a bain marie (i.e. over hot water):

7. The powders after sieving (they needed it they had gone quite solid):

8. The melted butters:

9. Whisking in the powders (I added a little of the agave at the end for some sweetness but it didn’t need much):


10. Then I spilt it into 4 lots and added the flavours and kept one lot plain. I learnt here that you need to keep each lot warm else it cools so quickly you can’t pour it into the moulds properly and it becomes all mis-shapen (see later)

11. I poured (and pushed!) it into ice cube trays and got 4 ‘cubes’ per flavour so 16 cubes in total. Then it went into the fridge to set for 1.5 hours (or in my case overnight).

12. Next morning at coffee time so we popped the cubes from the trays.

13. Some worked:

14. Some looked a bit mangled:


And the taste:

The flavours were nice but over-powered any chocolatey-ness (and I only used a teeny bit of each), the plain version was okay but not brilliant.

The texture:

Very grainy/gritty and not smooth at all, disappointing. Alex over at ‘A Brit’s Dish a Day‘ had the same problem so I’m guessing that’s how it is rather than us getting it wrong.

Fun?:

A bit. But the instructions aren’t clear that it will cool so quickly and become difficult to pour into moulds. I made it hard for myself by doing 4 flavours with one kit – the instructions anticipate one flavour being added to the melted butters before the powder.

Would I buy one?

Having looked up the price (£14.25 plus shipping, as far as I can tell, for 150g of chocolate) I had to lie down. I can get 3 different flavored Rococo bars (70g each) for this money or about 14 Divine plain bars (100g each). I’m sorry to have to say that I wouldn’t buy this either for myself or as a gift. It wasn’t enough fun, its pricey and the taste/texture wasn’t the tops. 

Not currently a winner – it needs some re thinking I feel.