Beans or no beans

This year we planted borlotti and runner beans. 

They’ve survived the onslaught of snails this year, and improvement over last summer.

They’ve produced nice flowers.

Pale pink on the borlotti, scarlet on the runners.

P1010837_2

But few beans.

So far I’ve counted 10 borlotti pods and 1 runner pod.

From 10 plants.

I guess its a better return just than money in a bank account, maybe.

P1010840_2

So what shall I do with my 11 beans?

Bay tree in flower

This morning while it was still sunny I took some pictures of the things springing to life in the garden.

This is my bay tree which has decided to flower.

Not sure if thats a good or a bad thing for a bay tree but it looks quite pretty.

In Season: Cheese and Onion

This article was first published in Francoise Murat & Associates newsletter in March 2010.

Mention cheese and onion and most people think of crisps. My quick Twitter survey revealed answers naming the Walkers brand, the colour of their bags (blue apparently) and even Gary Linekar, the face of Walkers crisps for so long he must surely have earned more from promoting crisps than from playing football and being a pundit. A few people were more inventive suggesting pasties and toasties but for most it was all about the crisps. The reason the crisp flavour works well is that the milky sour tang of cheese and the pungency of alliums are happy bedfellows, which means they have lots to offer in the kitchen, and spring is when plenty of both are at their best, real cheeses and real alliums, not Walkers crisps.

Thinking about the combination a whole host of dishes come to mind: leek and cheese sauce for pasta or chicken, onion soup with a lovely melting cheese crouton, cheese with pickled onions, cheese and onion marmalade sandwich, fresh goats cheese with chives, Yarg cheese wrapped in wild garlic, omelettes, frittatas or flans in a variety of allium and cheese combinations. The possibilities are endless.

British grown alliums are at their best now, lovely slim tender delicate leeks, new season spring onions, regular onions, shallots and of course wild garlic. Wild garlic has become an ‘on trend’ ingredient in the last couple of years as foraging has grown in popularity. It’s easy to find (the smell is a giveaway) particularly in woods by streams, you can grow it in your garden in a shady spot (but beware of it taking over) and you might see it at farmers’ markets or farm shops. You can eat the leaves and the flowers but like any allium it can range from mild to blow your head off in strength so always taste a little first before deciding how to use it. If you go foraging make sure you aren’t on private land or ask permission first, don’t collect from close to busy roads and be sure you know what it is you’ve picked. Don’t dig it up, leave enough for others to have some and for the plant to survive next year. The flowers are pretty sprinkled on salads and the leaves make a good substitute for leeks or spring onions.

As for cheese, fresh cheeses are particularly tasty in the spring as herds start to feed on grass again enriching the milk with clean herby flavours. Britain has a wealth of artisan cheeses and you should be able to find at least at one or two fresh cheeses in delis and farm shops. If you can’t then why not do a little experimenting in the kitchen and try making your own curd style cheese. It’s very simple to do and works with all types of fresh milk: cow’s, goat, sheep, even buffalo. Unpasteurised milk is lovely but normal works fine. This method is quick and easy and good as a supervised experiment for children. The yield varies depending on the milk, its highest with buffalo and lower with cow’s milk but whatever you choose you’ll get a lovely fresh delicious cheese. You can use the leftover whey in bread making in place of some of the milk or water.

Fresh cheese

Adapted from a recipe in the Casa Moro Cookbook by Sam & Sam Clark.

Ingredients:

  • 750ml milk
  • 1 tbsp essence of rennet (note that essence of rennet has already been diluted if you use undiluted rennet you must dilute it with water first)

Method:

  • Warm the milk to between 32-37C.
  • Add rennet and stir.
  • Pour into a bowl and cover with cling film.
  • Leave in a warm place for 30-45 minutes.
  • The curds will have set so cut them into about 3cm cubes whilst still in the bowl. Be gentle.
  • Leave for a further hour in a warm place.
  • Strain the curds into a muslin-lined colander.
  • Leave for about 6 hours for the whey to drain.

It’s as simple as that. The cheese will keep for up to a week in the fridge. It’s very mild in flavour and is particularly good rolled in some finely chopped wild garlic leaves or other fresh herbs. It also works well in omelettes, flans, and frittatas and stirred into pasta, with alliums of course and maybe a little mustard.

So next time you think of cheese and onion go beyond the immediate thought of a crisp flavour and branch out a bit in the kitchen.

An unexpected glut of cherry plums

Of what? Of cherry plums. What are they then?

The simple answer is they are plums that look like cherries and the trees can be found planted in many a street and garden mostly across the southern half of the country.

But you want to know more than that don’t you? Well then if you are sitting comfortably I shall begin.

© Danielle Harlow – Fotolia.com

We’ve lived in our house for nearly 12 years and when we arrived the garden was a bit ramshackle. It had been nice at one point I’m sure but the previous owner was rather old (he had lived his whole life in the house) and it had been left to get overgrown. Both garden and house were in need of a LOT of work. It was a great chance to start from scratch and not have to live with someone else’s idea of the ‘perfect’ terraced house. So we set to work. It took the best part of 8 years for the house to be completely finished and a bit like the Forth Bridge it’s now time to start decorating all over again (no walls to re-plaster though this time).

But I digress.

We have also made plenty of changes to the garden. Sadly the greenhouse hidden at the end was too rotten to save and the pond a little too large to look after. So they went. There were plants that were past their prime or couldn’t survive the severe trim they needed and others we didn’t know what to do with (or didn’t like – pampas grass anyone!). One of these was a quite young looking tree that didn’t show much promise; it was bolting for the light through the trees in our neighbours’ garden. The initial decision was that it would probably have to go. But we didn’t get round to it and then it was February and the tree came into blossom way before anything else giving a wonderful feeling of the approaching spring and providing some brightness in a wintery garden.    


The tree in blossom earlier this year


So it stayed. And each year the blossom has been wonderful, sometimes as early as January but never later than the end of February. The blossom is white and because it comes so early I started to assume maybe it was some kind of almond tree.Then we started to get fruit, not many at first and often hard and green with a small stone. It didn’t really look like an almond and I never got very far in trying to find out what it was.  


Plums on the tree in mid June

Then this year I became determined to find out what it was. I was spurred on by my day of wild food foraging but it wasn’t until I got a copy of The Forager Handbook (thanks @RachieGraham) that I was finally able to work out what it was. Some cross checking on the internet to confirm and just as the fruits started to be ready I knew at last that it is a cherry plum and that it is edible. And this year there seemed to be quite a lot of fruit.


Just some of the haul

So I started to collect the fruit, and I carried on collecting them, and on and on and on and on and on. And over about 3 days I collected about 15kg (I lost count somewhere I think). And then I needed to process them because eating 15kg of fruit straight off was not going to be a good idea. A couple of tweets later and I had recipes for pickled plums (thanks to @Weezos) and plum chutney (thanks to @TheAmpleCook) and some possible giveaways that in the end couldn’t be managed. Naturally I already had in mind some of my almost legendary fruit vodka so I got to work. Oh my and what work it was.    


Bucolic England (Flatford Mill, 2007. copyright Jonathan Taylor (Flickr user Northstander)

When I was a ‘corporate slave’ I harboured dreams of having a little chutney and preserves business, because when you sit at a desk most of the day building spreadsheet models, writing reports and trying to keep 150 very nice solicitors in check your mind roams off into bucolic styled dreams of country England and domestic pursuits such as baking bread and making chutneys. Every now and then I would rustle up a batch of some kind of chutney and dish it out to delighted friends and family – it all seemed such fun. Well let me tell you its not so much fun if you have to do it day in day out. And I say that after only 2 ½ days of plum processing! I reckon that each kilo of plums equated to about 180 actual plums.    


Just some of the 2700 plums I stoned

So I’ve stoned 2,700 plums BY HAND. I’m surprised I haven’t developed RSI. And the thing is I reckon I only got about ¼ of the total possible harvest…why? Well the tree is against our fence so half of the branches are over next-door’s garden so there’s 50% I didn’t get and then I was only collecting those that fell and were in good condition and weren’t under a prickly shrub. I took a peak under one of the shrubs and there were loads more under there so I reckon I lost another 25% that way (of the total not of the remainder – see what all those years with spreadsheets did to me). So I guess the tree had roughly 60kg of fruit on – not bad for what used to be a gangly upstart that we nearly got rid of. 

Now I have pickled plums, plum chutney, plum vodka, plum compote, bottled plums (in sweet syrup) and I’m still collecting about 500g a day……more vodka with them I think as that’s the easiest to make.    


Here’s the final haul


So if you’ve got a plum or damson tree watch out because I think it’s going to be a bumper summer. And if you’ve not well then don’t go too mad at the fruit farm 2½ days of fruit processing is more than enough for anyone.

Here’s some ways to deal with your own fruit glut. I’d also recommend The River Cottage Preserves Handbook for good ideas.     

My Legendary Fruit Vodka


I don’t use fixed measure for this but ratios.

Select your fruit of choice and weigh it. They tip it in a large glass jar (e.g. a preserving jar with a clip lid).
Add between half to the same weight of sugar (I usually used granulated) depending on how tart the fruit is and how sweet you want the result to be.
Then pour over about 1 ¼ -1 ½ times the volume of vodka as you had weight of fruit; so if you had a 750ml bottle of vodka you’d be looking to find between 500-600g of fruit.
Add any extras you think you’d like, a shaving of lemon peel is good with damsons or sloes.
Stir it all round to get as much as the sugar to dissolve as possible.
Close the jar and leave for a minimum of 6 weeks.
Check regularly and shake to help the sugar dissolve. After the first 6 weeks test the flavour and either leave to extract more flavour or strain and bottle.
Leave the bottle to mature for a further few months minimum. It gets better with age if you can resist for long enough.

Tips:
    

  • If you haven’t got a large glass jar but have a glut of fruit you need to use up quickly then put everything a big non-reactive pan, cover and then track down a jar – it’ll be fine for the first few weeks in a pan.
  • You can use gin instead of vodka but remember gin already contains its own aromatics so you’ll get a different flavour. Sloes and damsons work particularly well with gin.
  • If the fruit is quite hard then you need to break the skin to allow the flavours to mix – I do this by putting the fruit in a large freezer bag and bashing it a bit with the rolling pin. If you’ve stoned the fruit (or its a soft fruit) then there’s no need to do this.
  • You might want to strain through muslin or even a coffee filter before bottling if you want a really clear result. If you don’t mind sediment there’s no need to bother.
  • Be wise whom you share the vodka with; once people have tried some they’ll always be angling for another bottle.


Plum Pickle (adapted from a series of Tweets by Weezos)


1kg plums
1ltr wine vinegar
500g sugar
100g salt
spices of your choice

Salting the plums

Stone the plums and place them in bowl sprinkling salt over each layer as you go. Leave for 12-24 hours.
Sterilise glass jars in an oven for 10 minutes at R2/150C and leave to cool.
Bring the vinegar, sugar and spices to the boil and simmer for 5 minutes. Allow to cool.
Rinse the salt from the plums and pack in jars. Cover with pickling vinegar.
Seal and allow to mature for a minimum of two weeks (longer is better) in a cool place.
Good with terrines and game dishes.     

Spiced Plum Chutney (thanks to TheAmpleCook)


Nearly ready for the jars


This recipe is from Delia Smith.

3lb plums
1lb apples
3 onions
3 cloves garlic
2 heaped tsp ginger
1lb seedless raisins
1lb soft dark sugar
1lb Demerara sugar
1 pint vinegar (recipe says malt I used cider)
2 tbsp salt
2 cinnamon sticks
1oz allspice berries
1 dsp whole cloves
large non-reactive pan
6 jars

Note: you can adapt the spices to a mix of your favourites but you need roughly the same quantity, for example I had a smoked chilli in mine, and coriander because I like them.

Put the spices in a muslin square and tie it tightly with string.
Stone the plums, finely chop the apples (cored but leave on the skins), finely chop the onions and put them all in a large pan.
Crush the garlic and add it, the raisins, ginger, sugars and vinegar to the pan. Sprinkle in the salt and stir well.
Suspend the whole spices in their ‘bag’ into the pan and tie to the handle for easy removal later.
Bring to the boil and then simmer pour about 3 hours until the vinegar has almost disappeared and you have a thick, soft chutney. Remember to stir occasionally to prevent sticking.
Sterilise the jars and fill whilst both they and the chutney are still warm.
Leave to mature in a cool place for a minimum of 3 months.


Under the clock, with the flowers

Yesterday I had an assignation at Liverpool Street Station in London with a man I’d never met before called Dan (at least that what he said his name was). 

We agreed to meet at 11.30 BST.

He said I’d recognise him by the flowers and the gentle aroma of garlic. How he was going to identify me we didn’t establish. Gave me plenty of get out but not him.

Fortunately there aren’t that many people just standing looking like they are waiting for a man bearing a wild garlic plant at that time of day – most people are busy rushing to or from somewhere. Me, I was just loitering.

Anyway along came a guy with a garlic plant and I reasoned there wasn’t going to be 2 people doing this so I said ‘Hi’ and as luck would have it it was Dan! We chatted bit, Dan told me about how to look after the plant and what to expect. We compared foodie notes. I handed him a sample of my home made sloe vodka (vintage 2006) as a thank you and he went off to carry on his day job (and sneak a nip of vodka I think) and I took the garlic for a coffee followed by lunch – most enjoyable and not too many odd looks.

The plant is now at home, the cats have checked it out and decided its not for them, I sampled some today at lunch and was impressed, so next up is to plant it at the shady end of the garden and hope that next year we have a good crop.

I can’t wait for a feast of wild garlic next year :)

With big thanks to Dan over at FoodUrchin for giving me a little bit of his garden.

First rhubarb harvest

Today we harvested our first stalks of rhubarb this season. Coming in at six stalks it made a nice compact handful. We’ve got 3 rhubarb crowns and one seems to be slightly ahead of the others so all the stalks came off the one plant. 

Over the last few seasons we’ve had mixed cropping results – in the first few years after they were properly established we got a pretty good crop and then a couple of years ago they started to bolt very early in the season. We would get curious but quite attractive flowering rhubarb stems but very little worth harvesting and the flower stems are hollow so no good for the pot. It seems that letting them flower or bolt reduces the crop. This year we could see the same thing was going to happen again so after some searching in gardening books (most of which simply didn’t even seem to recognise the problem) we found some advice in a wonderful old book (The New Illustrated Gardening Encyclopaedia by Richard Suddell, from the 1940’s I believe, its full of lovely pen and ink illustrations) which said the flower buds should be removed as soon as they appear at ground level. So we’ve done that and it seems to have worked so far; I’m hoping for a better crop this year.

I really love rhubarb, its such a wonderful part of the British seasonal kitchen, it can be refreshing and light or warming with a tang depending on how its prepared. For this first batch I decided simple was best and just cooked the cut up stems briefly in a small amount of water with a little sugar added until they became soft but still held some shape. So now there is enough lightly cooked rhubarb to last me this week, for adding to breakfast muesli or making a quick desert with Greek yoghurt. I’m looking forward to its refreshing tang and starting to think of some different recipes to try when the next batch comes through. I might even decide to force one crown next winter to extend the season and make me feel revitalised by the onset of spring a little sooner.

Coming over all horticultural

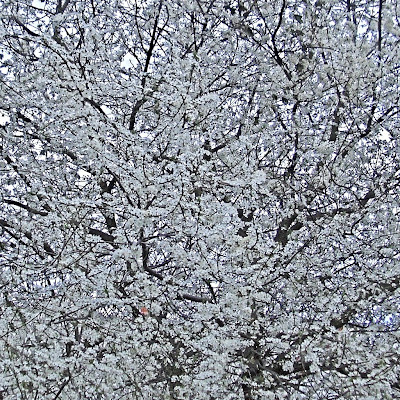
It really is amazing how a bit of sunshine, some daffodils and lots of blossom on the almond tree can make you come over all horticultural.

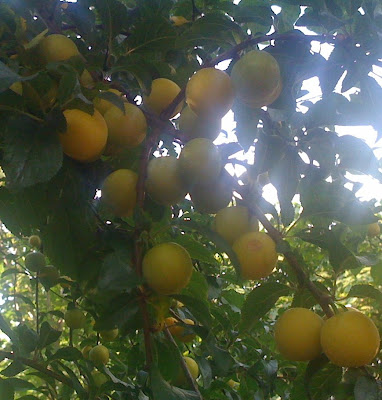
A few weeks ago I was thinking about growing veg from seed (its time to sow this weekend now its getting warmer), then we were reorganising the herb bed and lavishing love on the lemon tree but toady here’s a quick guide to making compost. Where will all this horticultural longing take me next?

How to make great compost?

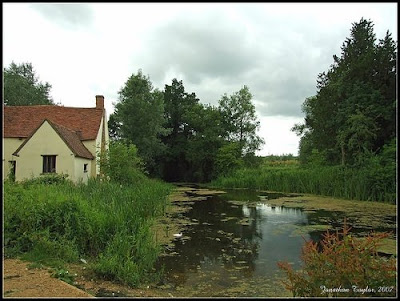
Well first make sure you have a garden – its pretty useless to start a project like this if you’ve nowhere to keep the stuff whilst it works its composting magic and nowhere to use it when its ready – a balcony isn’t going to cut it I’m afraid. So a garden is key, or an allotment – but if you have one of those I don’t imagine you’ll be needing my composting tips (or perhaps you just had to sell the 4×4 to make ends meet and now you’ve decided to grow your own veg as well? If so read on). Anyway first step make sure you have a garden or allotment.

Step two – select a place in the garden where you are going to install your compost bin(s) preferably not next to the patio/terrace area – compost bins are functional rather than decorative.

Three – get a compost bin, buy a plastic one (some local councils sell them relatively cheaply or, of course, there’s you local garden centre) or get really creative and build one. Remember to select a suitable size bin; you don’t want enough compost for a small farm if your garden is 10 foot square or for the bin to be the defining feature of your garden. And remember like all purchases for the home it always looks smaller in the shop than it does when you get it home (or simply to your car; witness the IKEA car park on any Saturday anywhere in the world). Measure up carefully and there’ll be no need to get jammed in the doorway trying to get the compost bin in (or, as once happened to me, having to send back a really lovely but quite giant lampshade that we couldn’t get through the front door let alone to its final destination).

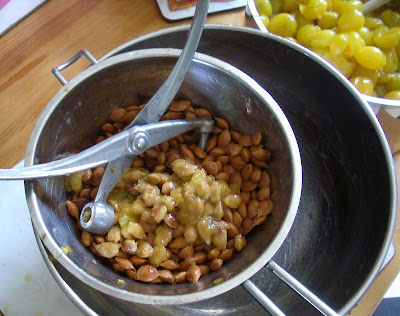
Four – get composting with all the bits and bobs of veg trimmings, tea bags, coffee grounds (plenty of those in my house), insides of loo and kitchen rolls, egg boxes (though you might want to save those to plant seeds in), shredded paper and envelopes, garden cuttings, egg shells, dead bunches of flowers, newspaper, orange peel and so on. Water it once in a while (if you have one of those condenser tumbler driers with a water collecting tray and you use only ecofriendly wash powder etc then use that water). BUT DON’T put in meat, bread, fish or anything like cat litter! Oh and try not to only have grass cuttings in there – you’ll end up with slime.

Five – delight in the lovely worms that decide to come live in your compost (you don’t have to touch them).

Step six – wait for about 12 months whilst the debris works its magic and transforms itself. Use compost to enrich your garden soil. Sit back smugly and think of how you have reduced your carbon footprint a teeny tiny bit.

Seven – watch old episodes of ‘The Good Life’ for more inspiration ?.

For more information try this link to the RHS.